How to create a new virtual machine using a volume snapshot?
Introduction
Volume snapshots provide a reliable way to duplicate or recover an existing virtual machine environment. By creating a new volume or image from a snapshot, you can quickly provision a new VM containing the same operating system, configuration, and data as the original instance.
This guide explains how to locate a volume snapshot, create a new volume or image from the snapshot, optionally create an image from a volume, provision a new virtual machine, and verify the newly created VM using the CMP dashboard.
Step 1: Locate the Snapshot
Log in to your CMP Cloud Dashboard.
Navigate to Volumes and select the boot volume associated with your VM.
Open the Snapshots tab.
Locate the snapshot you want to use for creating the new virtual machine.
Verify that the snapshot belongs to the correct source volume before proceeding.
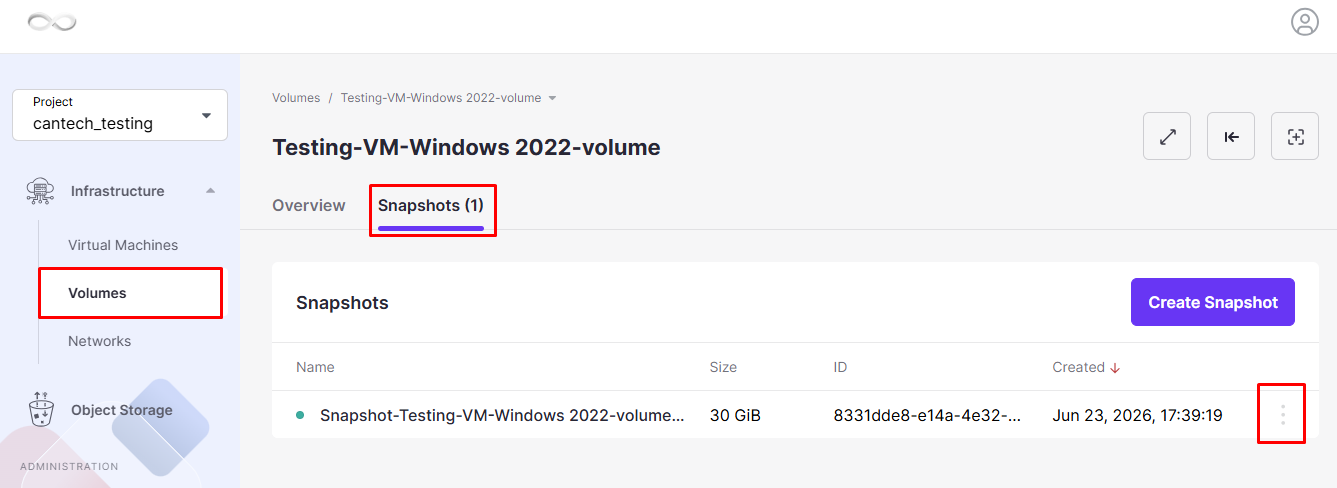
Step 2: Generate a Volume or Image from the Snapshot
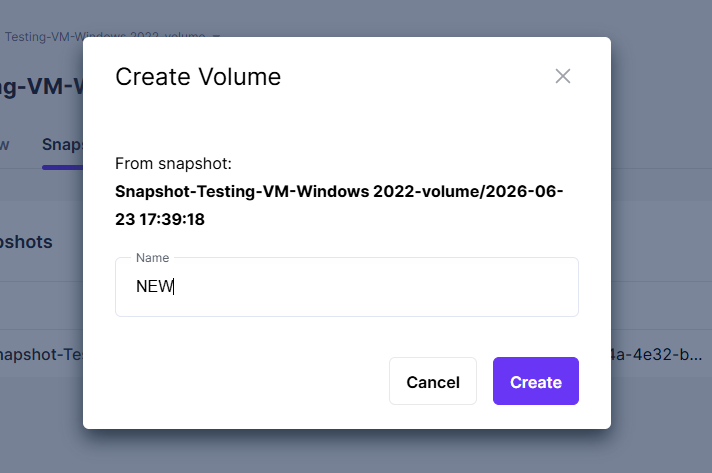
Option A: Create a New Volume
Select the desired snapshot.
Click Create Volume.
Enter a suitable Volume Name.
Review the details and click Create.
Wait for the process to complete. The newly created volume will be available under the Volumes section.
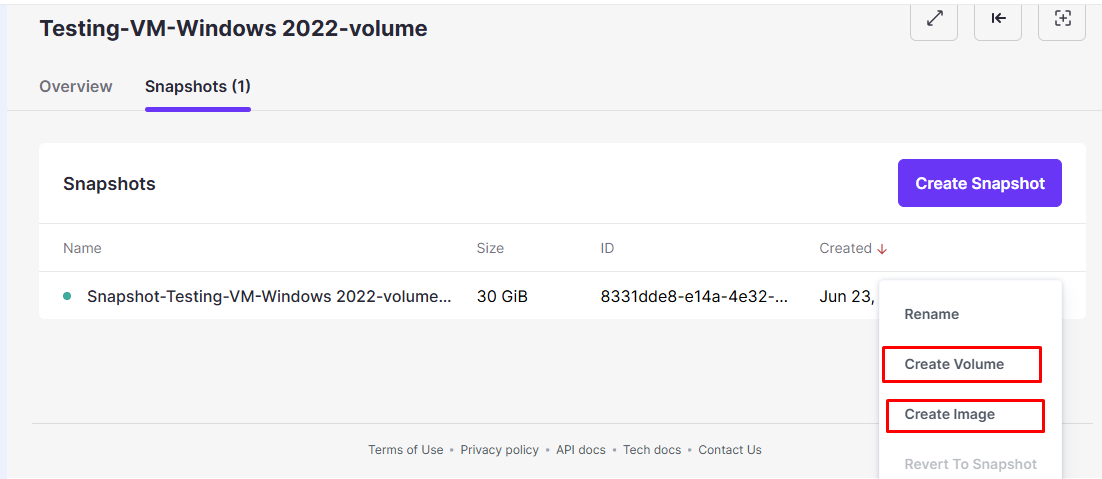
Option B: Create an Image Directly
Select the snapshot.
Click Create Image.
Provide an image name.
Confirm the operation and wait for the image creation process to finish.
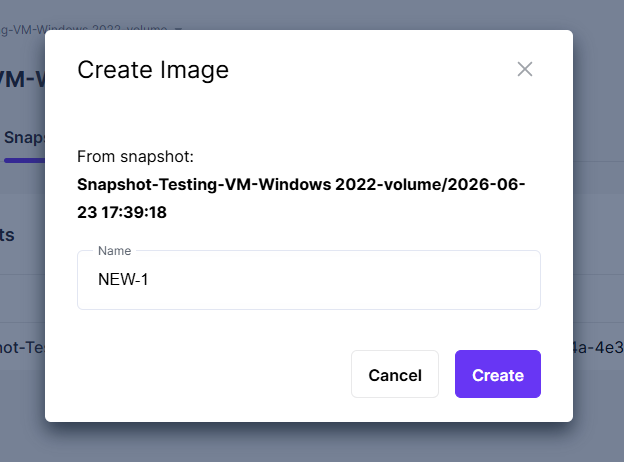
Step 3: Create an Image from a Volume (Optional)
If you created a volume from the snapshot or already have an existing boot volume, you can convert it into an image.
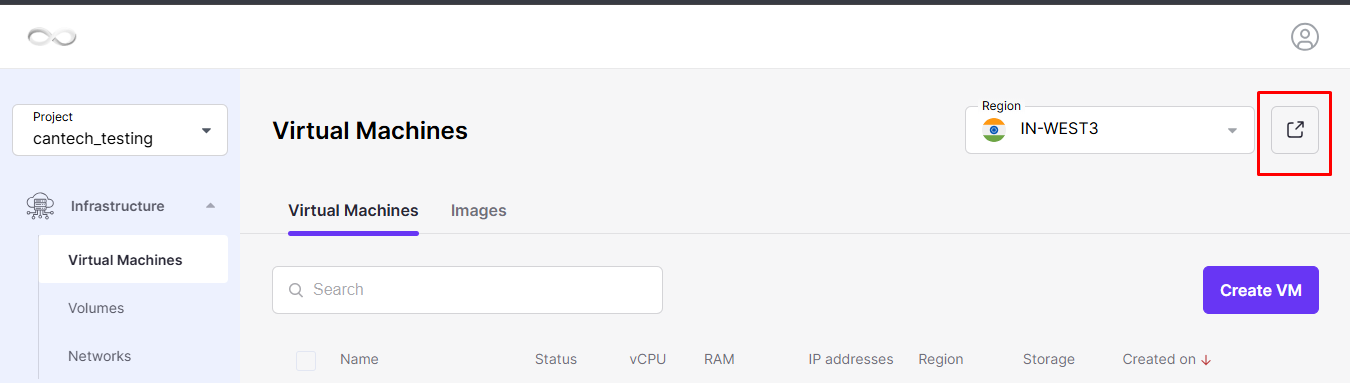
Open the CMP Region Advanced Dashboard.
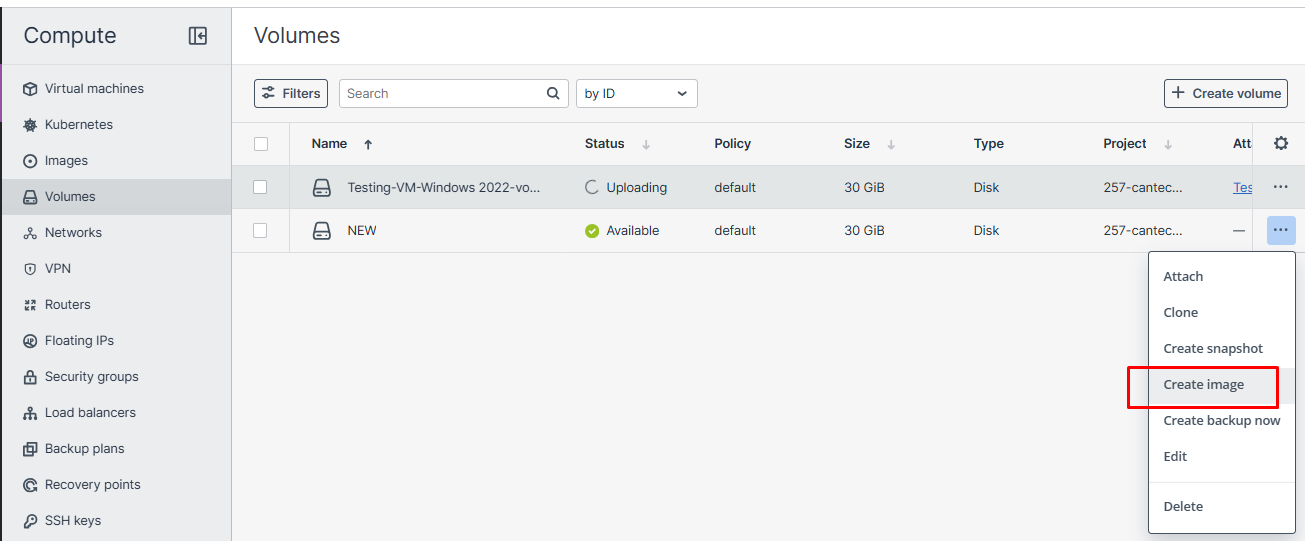
Navigate to Compute → Volumes.
Locate the required boot volume.
Click the Actions Menu (⋮) next to the volume.
Select Create Image.
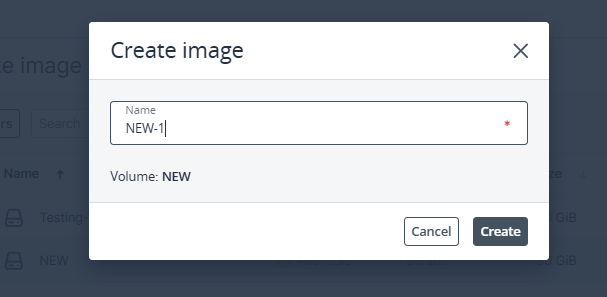
Enter an appropriate image name.
Click Create and wait for the image to become available.
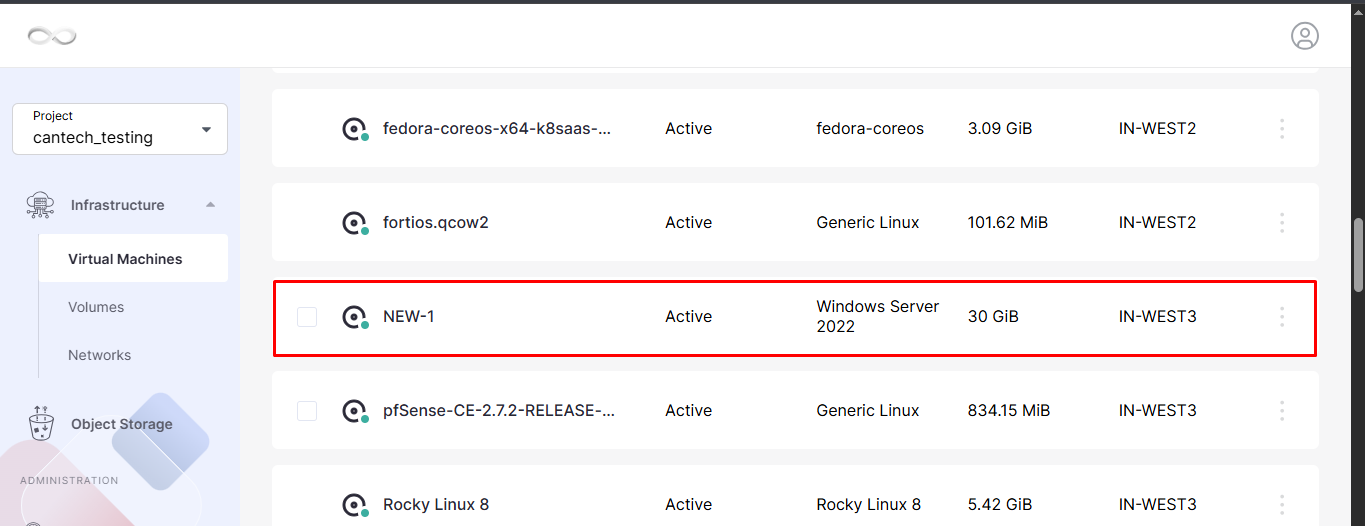
The newly created image will appear in the Images section.
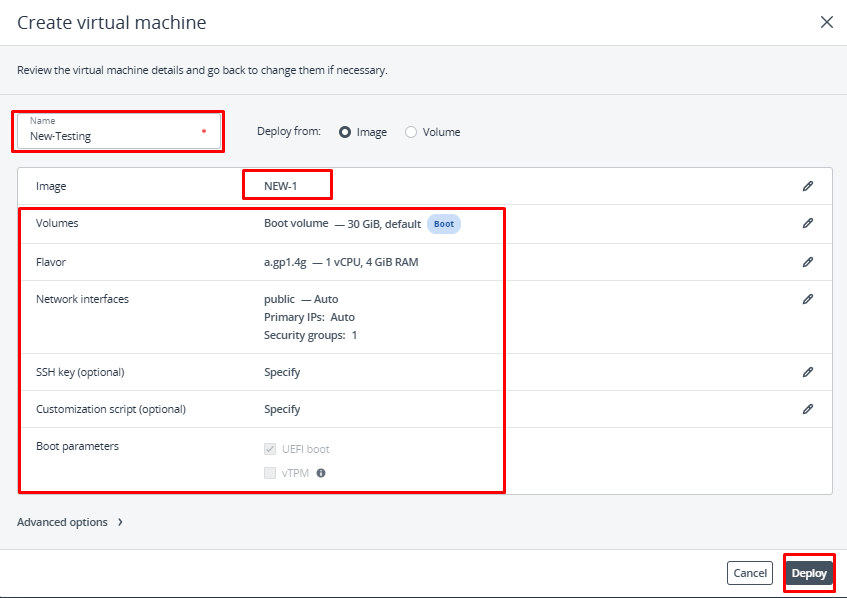
Step 4: Provision a New Virtual Machine
Once the image is available, you can deploy a new VM.
Navigate to the Virtual Machines section.
Click Create Virtual Machine.
Select the image created from the snapshot or volume.
Choose the desired Flavor (CPU, RAM, and Storage configuration).
Select the required Network Interface(s).
Enter a Virtual Machine Name.
Configure any additional settings as required.
Click Create or Deploy to start the VM provisioning process.
Step 5: Verify the Newly Created VM
After deployment is complete, perform the following checks.
Verify VM Status
Confirm that the VM status shows Running or Active.
Test Access
Connect using one of the available methods:
VNC Console
SSH (Linux)
RDP (Windows)
Validate Data and Services
Ensure all expected files, applications, and configurations are present.
Verify that services and applications start correctly.
Confirm network connectivity and functionality.
Conclusion
Creating a new virtual machine using a volume snapshot in CMP allows you to provision a VM based on an existing environment. You can create a new volume or image from the snapshot, use the resulting image to provision a new VM, and then verify its status, access, data, services, and network connectivity.
Follow the steps in this guide to create and verify a new virtual machine using a volume snapshot through the CMP dashboard.
Frequently Asked Questions
1. What is required to create a new VM using a volume snapshot?
You need an existing volume snapshot that can be used to create a new volume or image for VM provisioning.
2. How do I locate a volume snapshot in CMP?
Log in to the CMP Cloud Dashboard, navigate to Volumes, select the boot volume associated with the VM, and open the Snapshots tab.
3. Can I create a new volume from a snapshot?
Yes. Select the required snapshot, click Create Volume, enter a suitable Volume Name, review the details, and click Create.
4. Can I create an image directly from a snapshot?
Yes. Select the snapshot and click Create Image. Provide an image name, confirm the operation, and wait for the image creation process to finish.
5. Can I create an image from a volume?
Yes. Open the CMP Region Advanced Dashboard, navigate to Compute → Volumes, select the required boot volume, and use the Actions Menu (⋮) to select Create Image.
6. How do I create a new VM from the snapshot?
Once the required image is available, navigate to Virtual Machines, click Create Virtual Machine, select the image, configure the Flavor and Network Interface(s), enter the VM name, and click Create or Deploy.
7. How can I verify the newly created VM?
Confirm that the VM status is Running or Active, then test access using VNC Console, SSH for Linux, or RDP for Windows.
8. What should I verify after creating the VM?
Verify that the expected files, applications, and configurations are present. Also confirm that services start correctly and that network connectivity and functionality are working as expected.