How to Add Your Own ISO Image to Cantech Cloud and create Virtual machine Using Custom Image
Introduction
Cantech Cloud allows you to upload custom ISOs or images to deploy virtual machines with your preferred operating systems or pre‑configured templates. This feature is ideal for migrating on‑premise setups, testing specialized environments, or maintaining consistency across deployments. By verifying the uploaded image and configuring VM settings properly, you can ensure smooth and secure provisioning..
Step 1: Upload Your Custom Image
1. Log in to your Cantech Cloud account.
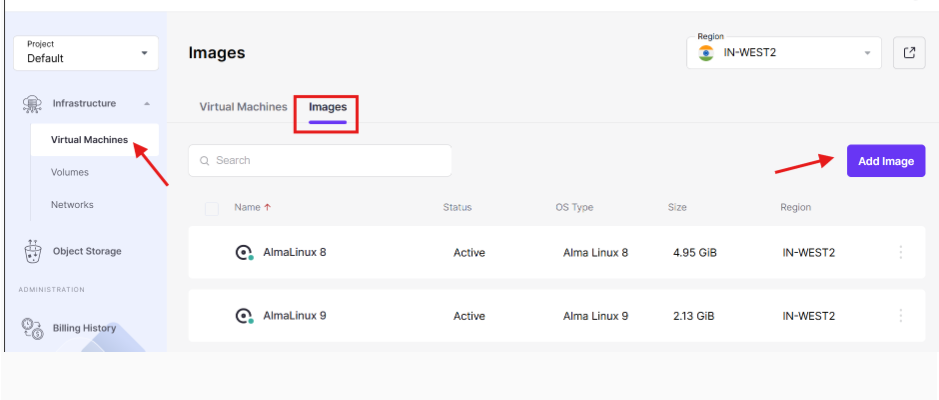
2. In the left-hand menu, navigate to Virtual Machines → Images.
3. Select the region where you want to upload the image.
4. Click Add Image.
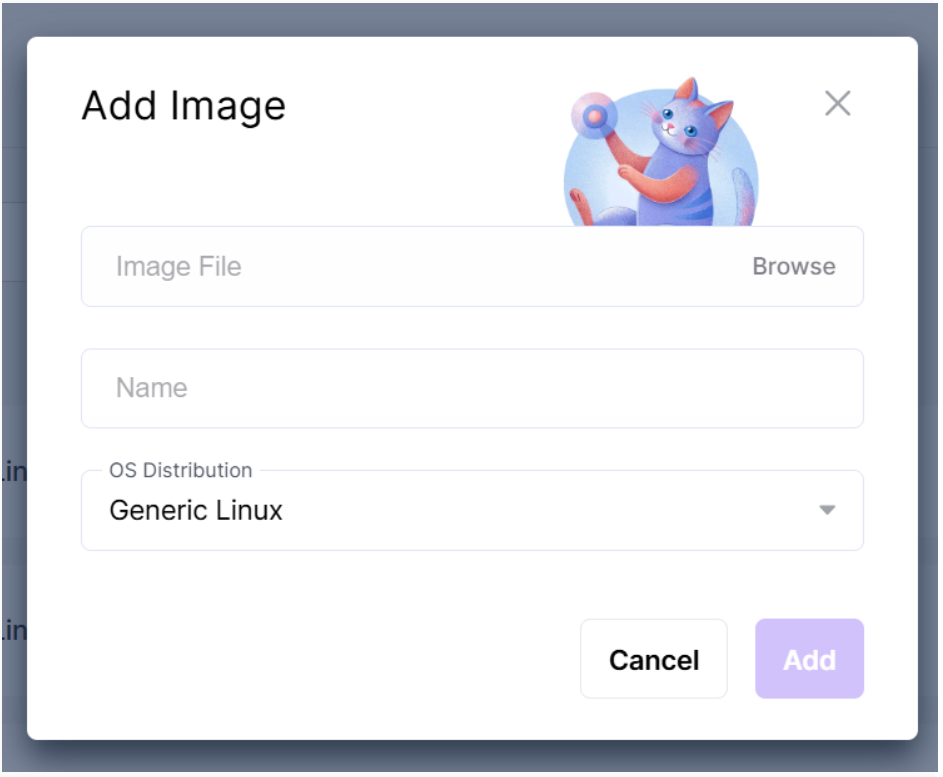
5. Choose your custom ISO/image file from your local system and click Add to begin the upload.
Step 2: Verify the Uploaded Image
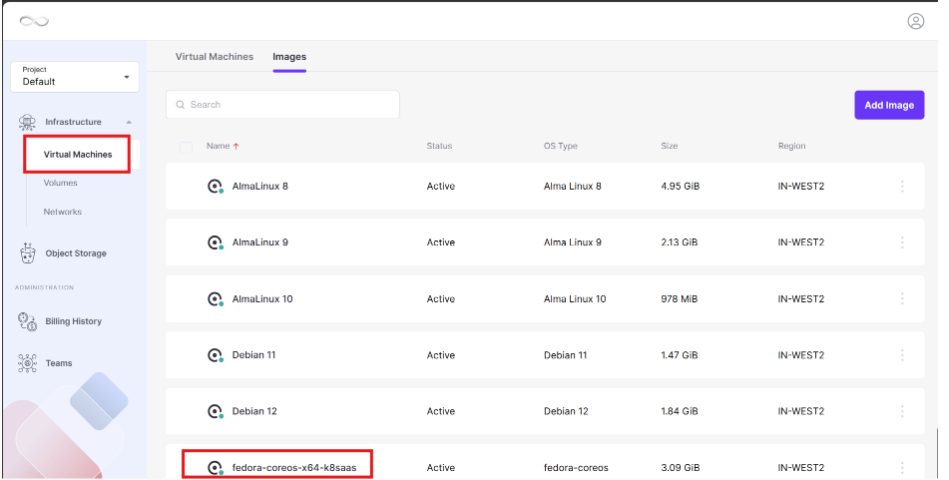
1. Once the upload completes, go to Virtual Machines → Images.
2. Confirm that your image appears in the list with status Available or Ready.
3. If the status shows Processing, wait until the upload is complete before deploying.
Step 3: Create a Virtual Machine Using the Custom Image
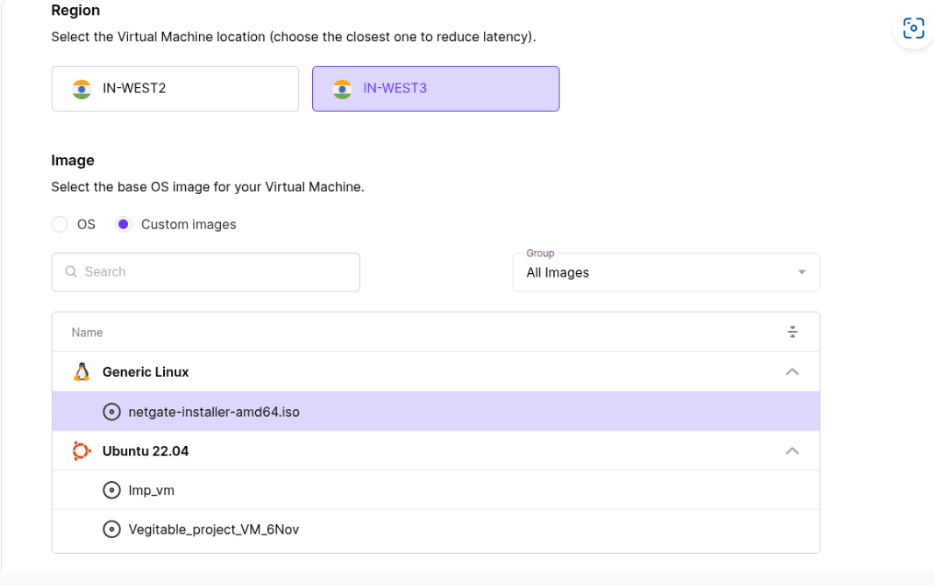
1. Choose the same region where your image was uploaded.
2. Navigate to Virtual Machines → Create VM
3. From the image section, select the custom image you uploaded earlier.
4. Configure other settings:
Server Type: Choose the compute plan (CPU and RAM).
Storage: Adjust the disk size
Network: Select private/public network interfaces as needed.
Name: Set a custom name for your Virtual Machine.
Access: Add SSH keys or set a root password.
Troubleshooting
- Image not visible after upload → Refresh the Images tab; check region selection; ensure upload completed (status must be Available/Ready).
- VM creation fails → Confirm you selected the same region as the uploaded image; verify compute/storage/network settings.
- Upload stuck in Processing → Wait until status changes to Ready; large ISO files may take longer.
- Cannot access VM → Ensure SSH keys or root password were set correctly during VM creation.
Important Notes
- Upload images under the correct region; VM creation must use the same region.
- Status must be Available/Ready before using the image.
- Configure VM settings carefully: CPU/RAM, disk size, and network interfaces.
- Always set secure access credentials (SSH keys or strong root password).ConclusionUploading custom ISOs or images in Cantech Cloud enables flexibility for operating systems, templates, and migrations. Proper region selection, verification of image status, and careful VM configuration ensure smooth deployment and reliable access.
FAQ
Q1. Can I upload any ISO/image?
A: Yes, as long as it’s a valid OS image or template supported by Cantech Cloud.Q2. Why don’t I see my uploaded image?
A: Check the region and refresh the Images tab; ensure upload completed successfully.Q3. What does “Processing” status mean?
A: The image is still uploading or being prepared. Wait until it shows Available/Ready.Q4. Do I need to select the same region when creating a VM?
A: Yes, the VM must be created in the same region where the image was uploaded.Q5. How do I access my VM after creation?
A: Use the SSH key or root password configured during VM setup.