How to Extend a Basic Volume on a Windows VM?
Introduction
You can increase the size of an existing basic volume on a Windows virtual machine by using available unallocated space on the same disk. Windows provides the Disk Management utility to view available disk space and extend an existing volume without creating a new volume.
This guide explains how to identify unallocated space, verify the required conditions, and extend a basic volume using the Extend Volume Wizard. It also explains how to verify the updated capacity after the operation is complete.
Prerequisites
Before extending a basic volume, ensure the following requirements are met:
- Unallocated space must be directly next to the volume that you want to extend.
- There must be no other volume between the target volume and the unallocated space.
- The unallocated space must be on the same disk as the volume you want to extend.
- A volume cannot be extended across different disks using this procedure.
Important: If the unallocated space is not directly adjacent to the volume, the Extend Volume option may not be available in Disk Management.
View Unallocated Space
You can use Windows Disk Management to view the available disk space and identify unallocated space.
Step 1: Open Computer Management
Open the Computer Management console by searching for Computer Management from the Windows taskbar.
Step 2: Open Disk Management
Navigate to:
Storage > Disk Management
The Disk Management window displays the available disks and their partitions.
Step 3: Identify Unallocated Space
Review the disk layout and identify the available unallocated space.
In Disk Management, unallocated space is displayed as a black bar with the label Unallocated.
If multiple disks are attached to the VM, select the appropriate disk and review its partitions and available unallocated space.
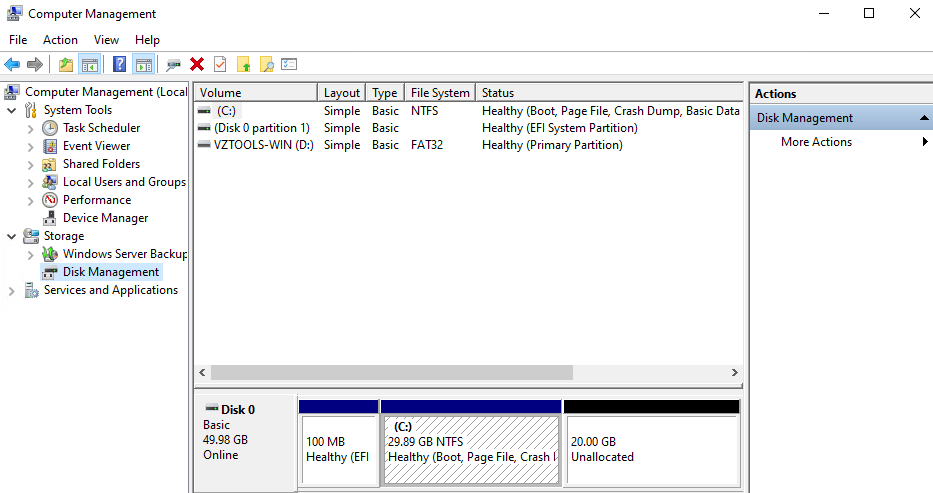
Note: Confirm that the unallocated space is on the same disk and directly adjacent to the volume that you want to extend.
Extend a Basic Volume
Once the required unallocated space has been identified, follow the steps below to extend the volume.
Step 1: Open the Extend Volume Wizard
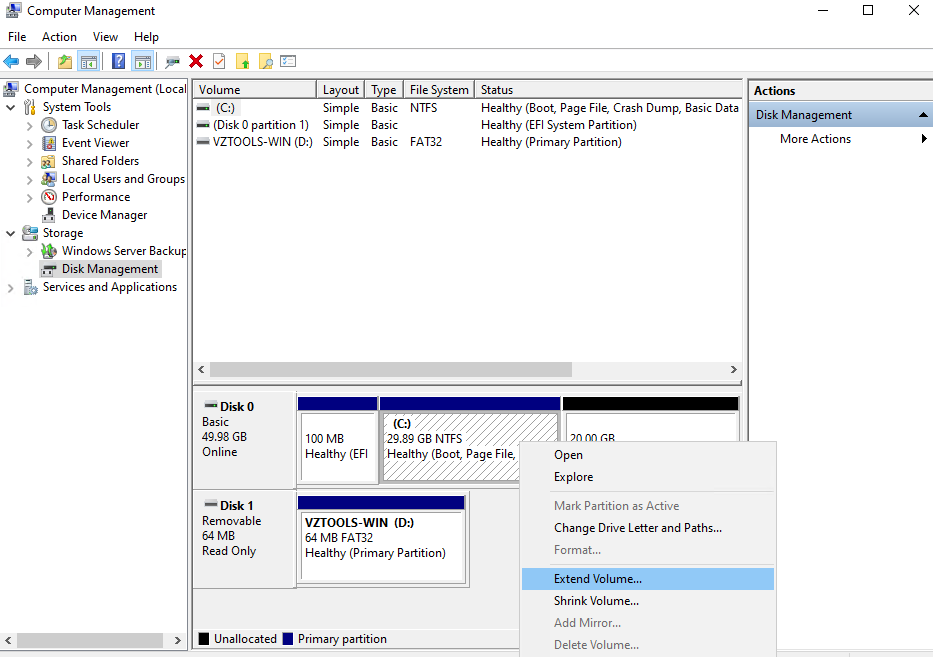
In Disk Management, right-click the volume that you want to extend and select Extend Volume.
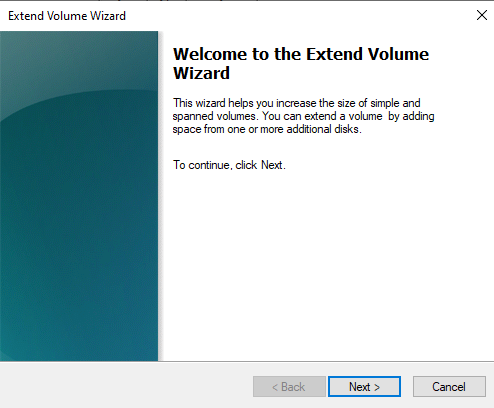
The Extend Volume Wizard will open.
Step 2: Continue with the Wizard
In the Extend Volume Wizard, select Next.
Step 3: Select the Amount of Disk Space
Under Select Disks, specify how much of the available disk space you want to use to extend the volume.
By default, Windows selects the Maximum available space.
If you want to keep some of the unallocated space available for creating another volume, enter a smaller amount.
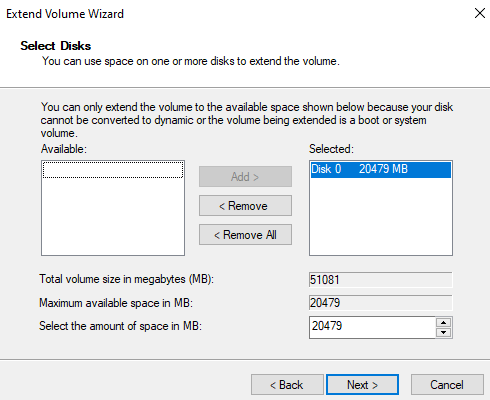
Tip: If you want to use all available unallocated space for the existing volume, keep the default maximum value.
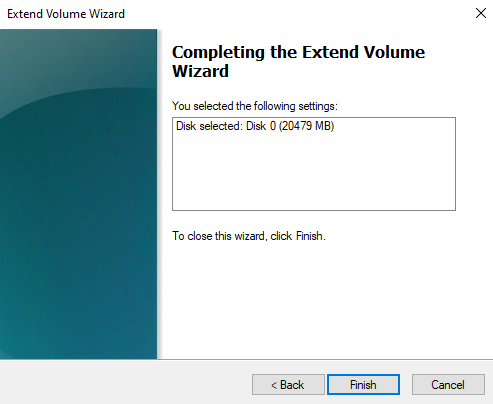
Step 4: Complete the Extension
Select Next and then select Finish to complete the operation.
Windows will extend the selected volume using the specified amount of unallocated space.
Step 5: Verify the Expanded Volume
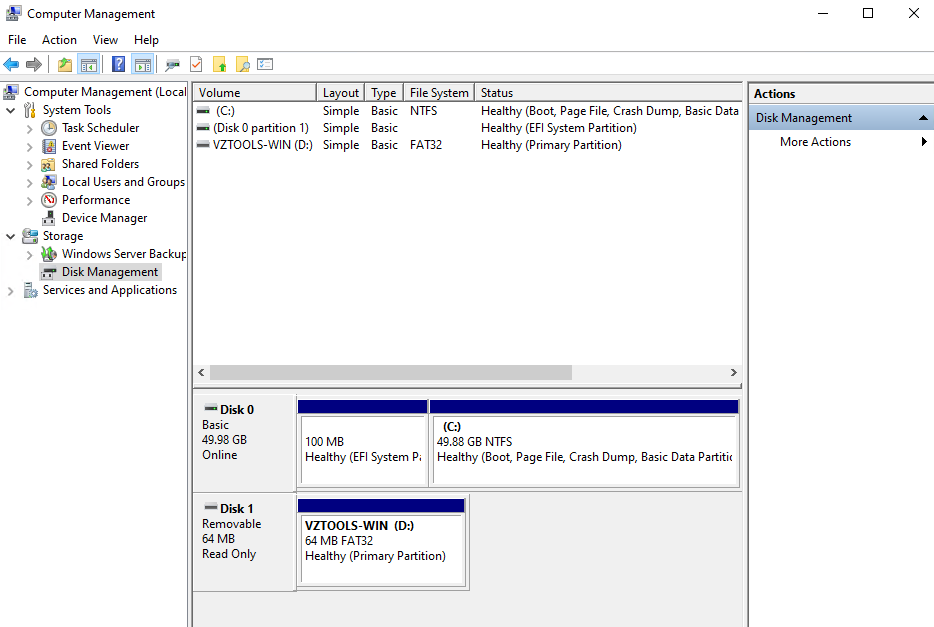
After the operation is completed, return to Disk Management.
The volume should now appear with its increased capacity.
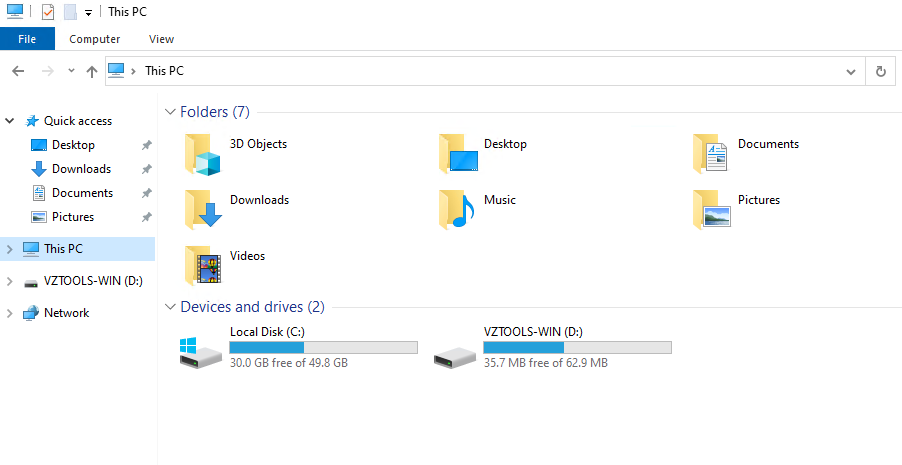
You can also open File Explorer and verify that the disk shows the updated capacity.
Secondary Volume Attached to a Windows VM
If a secondary volume has been attached to a Windows VM, the new disk may not immediately appear in File Explorer.
Windows may display a newly attached disk as Offline or Unallocated.
To make the new disk usable, it must first be brought online and initialized using the Disk Management utility.
To know more about “How to Manage Newly Added Disks on a Windows VM?”. Click Here for more details.
Troubleshooting
Extend Volume Option Is Not Available
If Extend Volume is unavailable when you right-click the volume, verify the following:
- Unallocated space is available.
- The unallocated space is directly next to the volume.
- There is no other partition or volume between the target volume and the unallocated space.
- The unallocated space is on the same disk as the target volume.
The Additional Space Is on Another Disk
The basic volume cannot be extended across different disks using this procedure.
Verify the disk layout in Disk Management and ensure that the required unallocated
space exists on the same disk as the volume you want to extend.
The Updated Capacity Is Not Visible
After completing the extension:
- Open Disk Management and verify the volume size.
- Open File Explorer.
- Check the available capacity of the corresponding drive.
If the volume still shows the previous capacity, refresh Disk Management and verify that the extension operation completed successfully.
Conclusion
Extending a basic volume on a Windows VM in CMP allows you to increase an existing volume by using available unallocated space on the same disk.
Before starting, verify that the unallocated space is directly adjacent to the target volume and that no other volume exists between them. Using Windows Disk Management and the Extend Volume Wizard, you can select the required amount of available space and complete the volume extension.
After the operation, verify the updated capacity in both Disk Management and File Explorer.
FAQ’s
Can I extend a Windows volume using unallocated space?
Yes. An existing basic volume can be extended using available unallocated space on the same disk.
Does the unallocated space need to be next to the volume?
Yes. The unallocated space must be directly adjacent to the volume you want to extend, with no other volume between them.
Can I extend a volume using space from another disk?
No. The procedure described in this article does not support extending a volume across different disks.
Where can I see unallocated space in Windows?
Open Computer Management > Storage > Disk Management. Unallocated space is displayed as a black bar labeled Unallocated.
How do I extend the volume after finding unallocated space?
Right-click the target volume in Disk Management, select Extend Volume, and follow the Extend Volume Wizard to select the amount of space and complete the operation.
Can I use only part of the available unallocated space?
Yes. The Extend Volume Wizard allows you to specify how much of the available space should be used. The default selection uses the maximum available space.
How can I verify that the volume was successfully extended?
Check the volume size in Disk Management and then verify the updated capacity in File Explorer.
What should I do if a newly attached secondary volume does not appear in File Explorer?
Open Disk Management and check whether the newly attached disk is Offline or Unallocated. A new disk may need to be brought online and initialized before it can be used.