Introduction
CMP Object Storage provides scalable storage for files and other unstructured data. It can be used for application data, static website content, online storage, backups, and other workloads that require object-based storage.
A bucket is a storage container used to organize and manage objects such as files. This guide explains how to create a bucket from the CMP Dashboard, upload files, create and remove folders, delete a bucket, and enable S3 access by generating access credentials.
Prerequisites
Before managing Object Storage, ensure that:
- You have access to the CMP Dashboard.
- Object Storage is available for your account.
- You have the required permissions to manage Object Storage resources.
- For S3-based access, S3 access must be enabled and an access key pair must be generated.
Note: S3 access credentials consist of an Access Key ID and a Secret Access Key. Treat the Secret Access Key as sensitive information and do not share it publicly.
Create a Bucket
A bucket is a container used to store and organize objects in Object Storage.
Step 1: Log in to the CMP Dashboard
Log in to your CMP Dashboard using your account credentials.
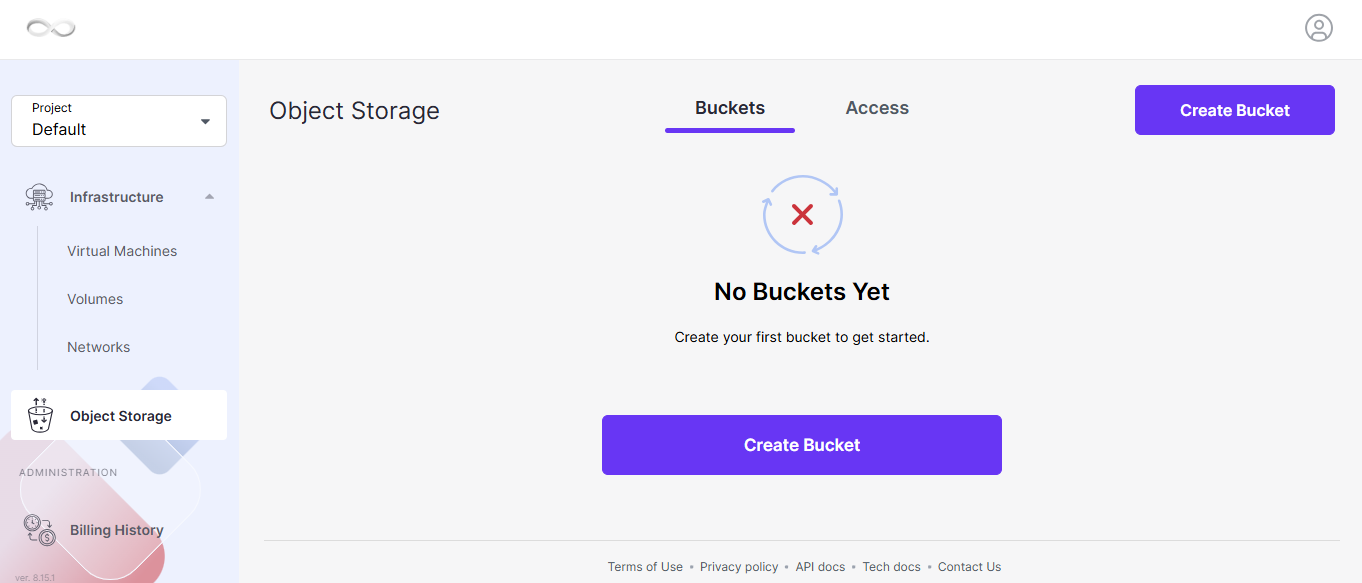
Step 2: Open Object Storage
Navigate to Object Storage from the CMP Dashboard.
Select Create Bucket.
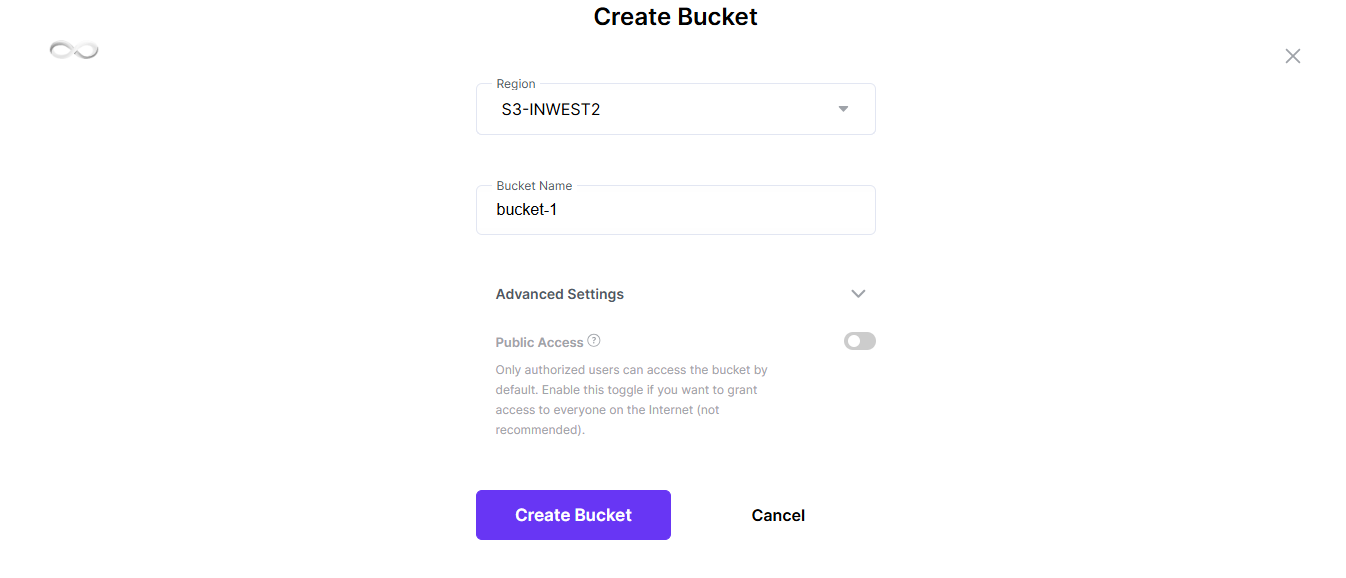
Step 3: Enter the Bucket Name
Enter a unique name for the bucket.
If you want the bucket to be publicly accessible, enable the Public Access option.
Important: Enable public access only when the objects stored in the bucket are intended to be publicly accessible.
Step 4: Create the Bucket
After entering the required details, select Create Bucket.
Once the bucket is successfully created, it will appear in the Object Storage bucket list.
Upload Files to a Bucket
After creating a bucket, you can upload files from your local machine.
Step 1: Open the Bucket
Navigate to Object Storage and select the bucket where you want to store the files.
Step 2: Upload Files
Use the upload option to select files from your local machine.
Select the required file and complete the upload.
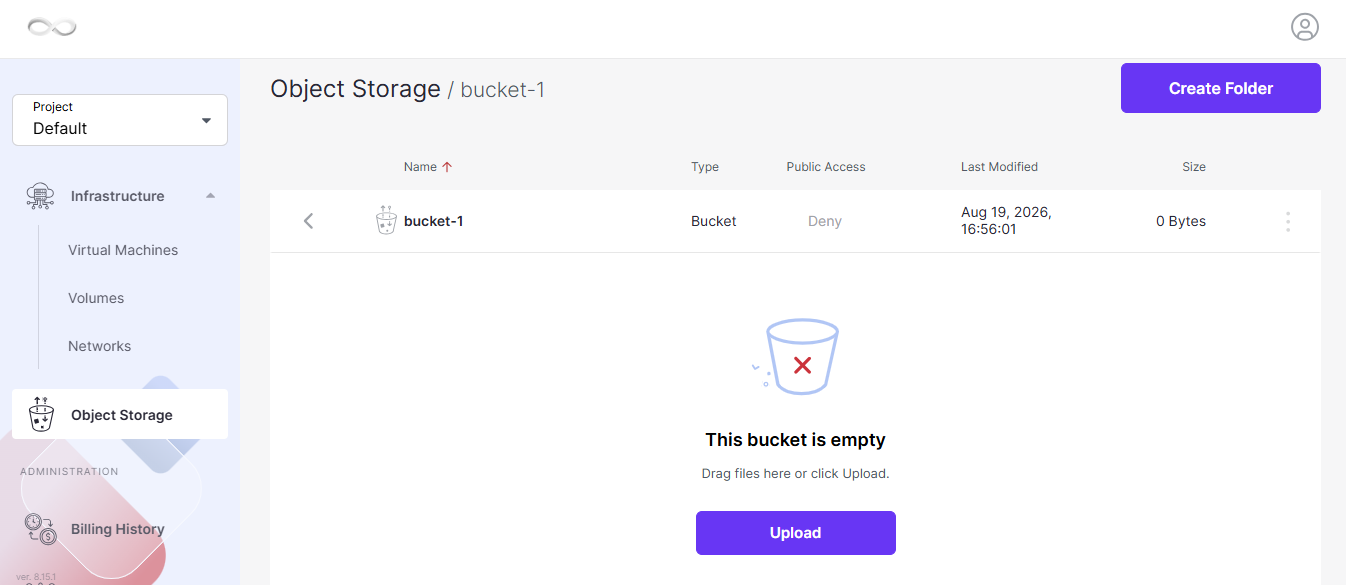
After the upload is completed, the file will appear in the bucket.
Note: The uploaded file is stored as an object inside the selected bucket.
Create a Folder
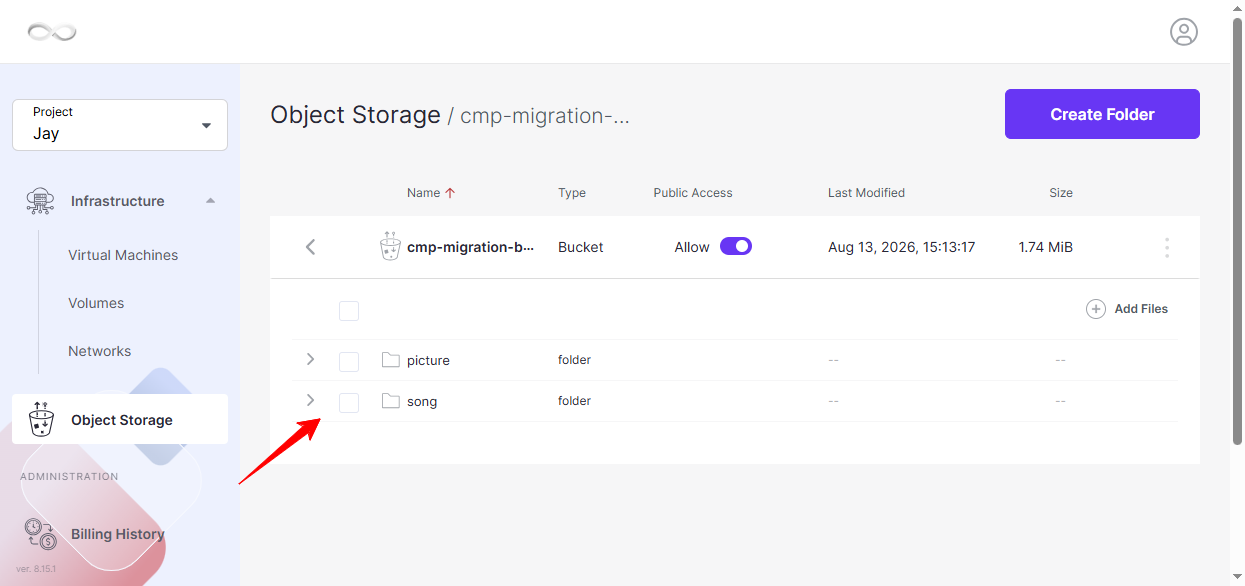
Folders can be created within a bucket to organize objects.
Step 1: Open the Required Bucket
Navigate to:
Object Storage → Bucket
Open the bucket where you want to create the folder.
Step 2: Create the Folder
Select Create Folder.
Enter the required folder name and create the folder.
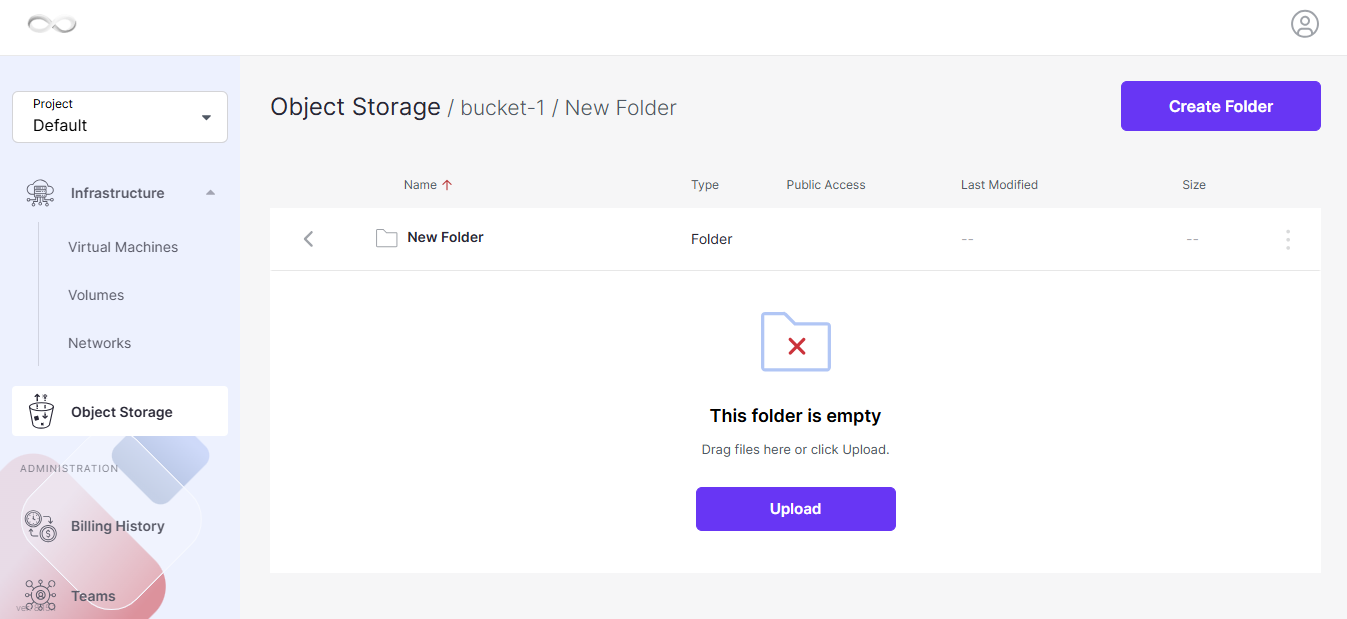
The newly created folder will appear inside the bucket.
You can then upload files into the folder to organize your objects.
Remove a Folder
If a folder is no longer required, it can be removed from the bucket.
Step 1: Select the Folder
Open the required bucket and select the folder that you want to remove.
Step 2: Remove the Folder
Select Remove to delete the folder.
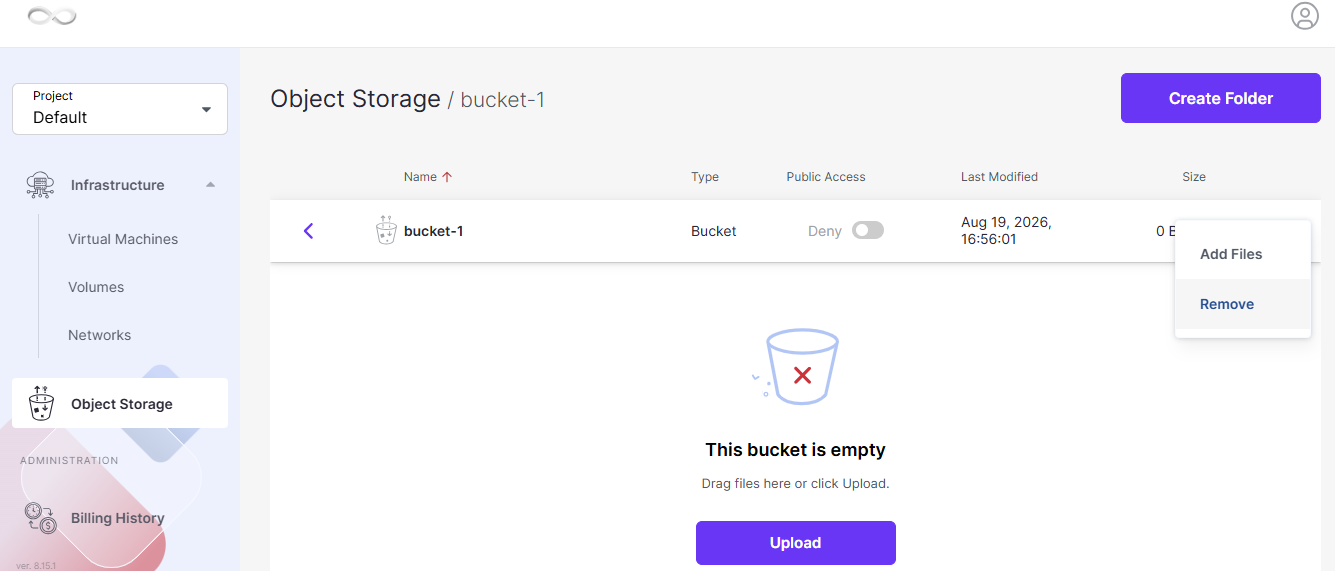
Important: Verify that you are removing the correct folder before confirming the operation.
Remove a Bucket
A bucket can be removed when it is no longer required.
Step 1: Select the Bucket
Navigate to the Object Storage bucket list and select the bucket that you want to remove.
Step 2: Remove the Bucket
Select Remove and confirm the deletion.
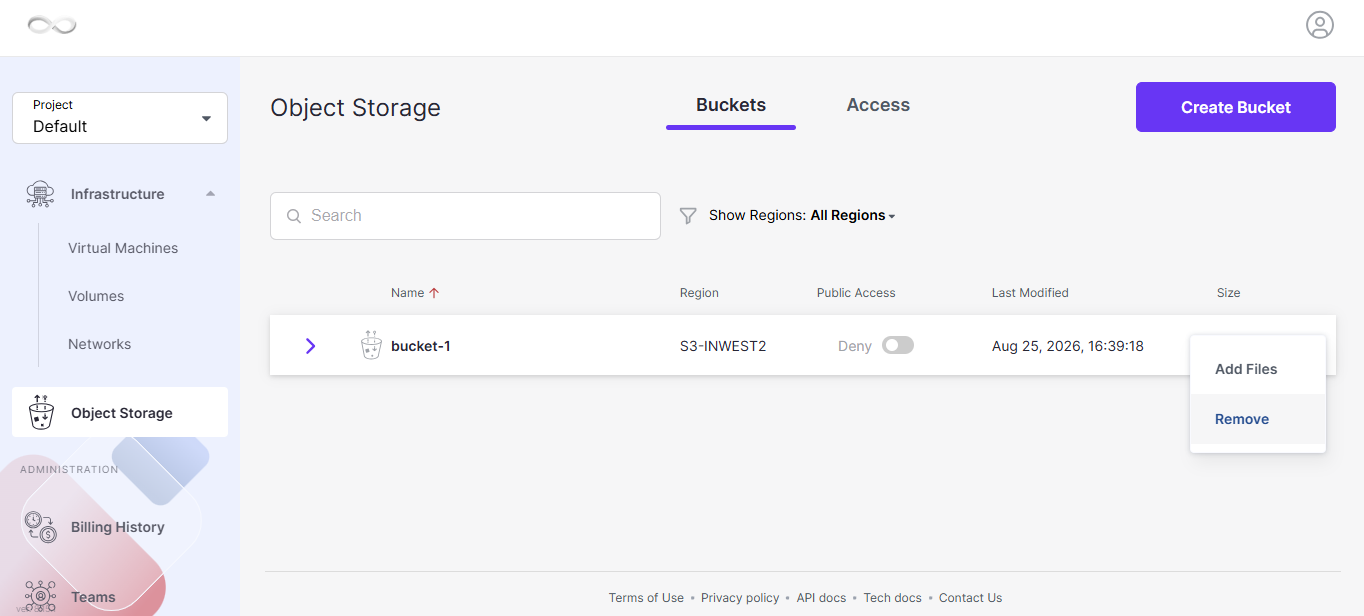
Warning: Make sure that the bucket is no longer required before deleting it. Bucket deletion can remove the storage container and its associated data.
Enable Access to S3 Storage
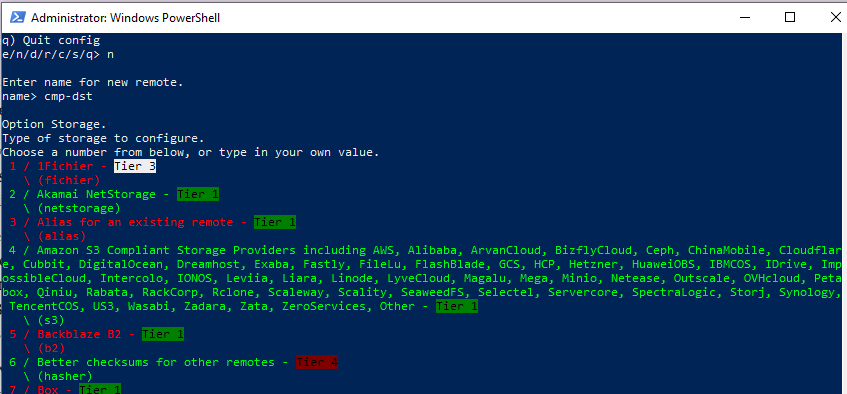
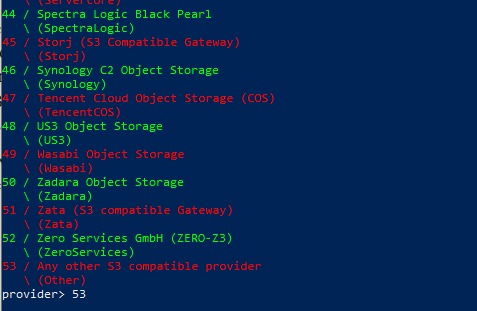
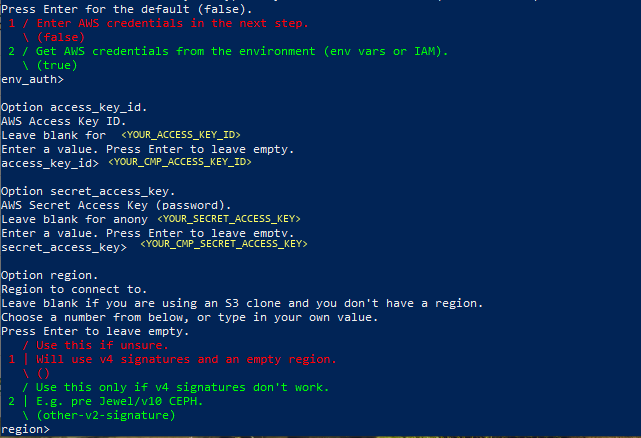
CMP Object Storage provides S3-compatible access. To manage S3 resources programmatically or through S3-compatible tools, you need an S3 access key pair.
The access key pair consists of:
- Access Key ID
- Secret Access Key
The Access Key ID can be considered the identifier used for authentication, while the Secret Access Key is the corresponding secret credential.
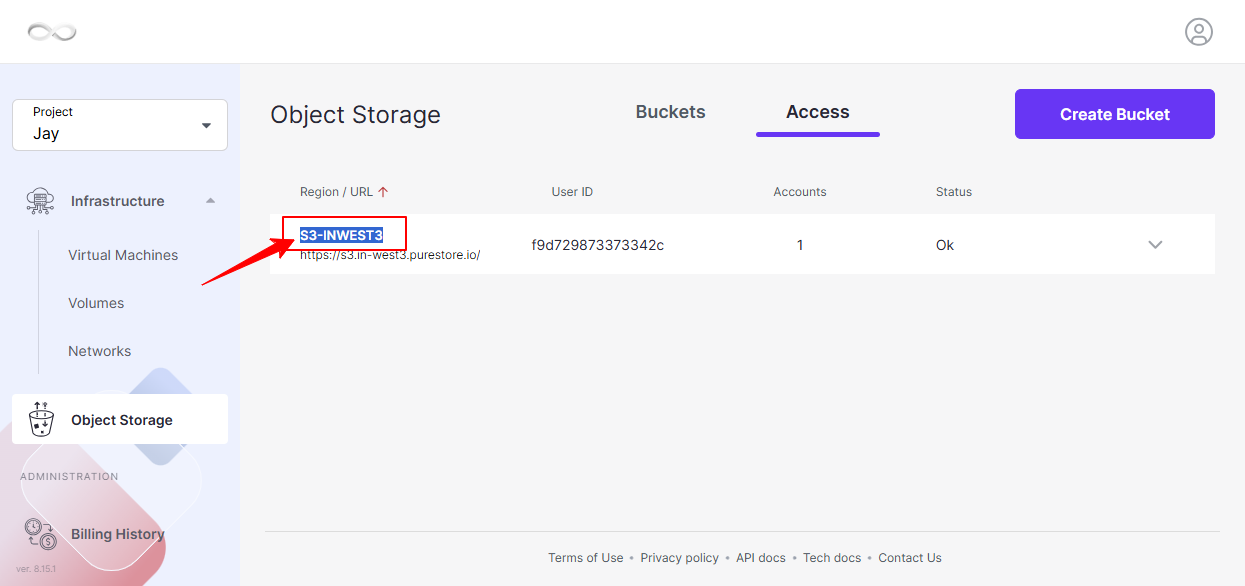
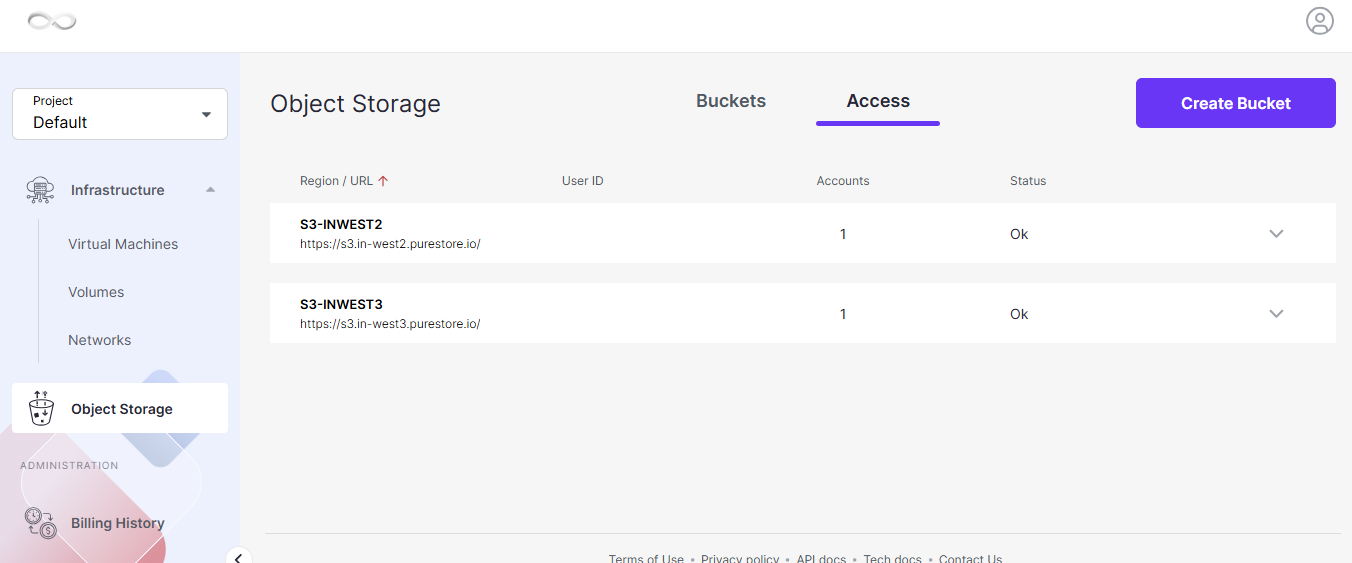
Step 1: Open Object Storage Access Settings
Navigate to Object Storage in the CMP Dashboard.
Open the Access tab.
Step 2: Add an S3 User
Expand the available options using the dropdown arrow.
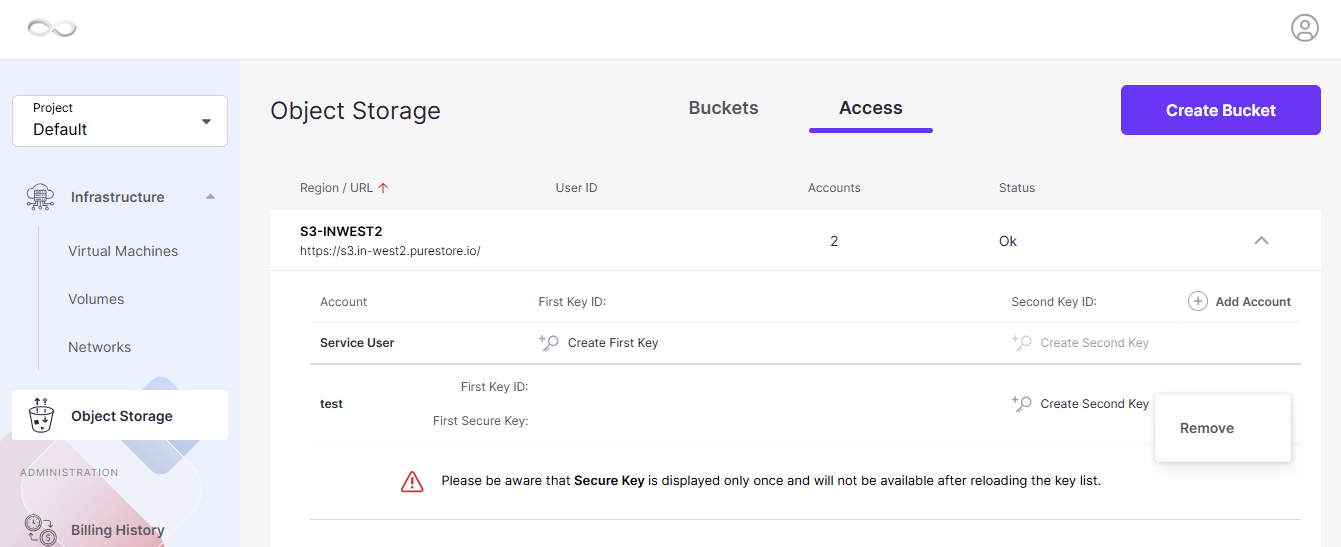
Select + Add Account to create a new S3 user.
The system automatically generates an access key pair:
- Access Key ID
- Secret Access Key
Step 3: Copy the Access Credentials
Use the copy icon next to the corresponding credential to copy:
- Access Key ID
- Secret Access Key
Security Note: Store the Secret Access Key securely.
Delete an S3 Access Key Pair
If an S3 access key is no longer required, it can be removed from the Object Storage access settings.
Step 1: Open the Access Tab
Navigate to:
Object Storage → Access
Locate the S3 Access Keys section.
Step 2: Delete the Access Key
Select the Delete icon next to the access key that you want to remove.
Confirm the operation by selecting Delete.
Important: Applications or tools using the deleted access key will no longer be able to authenticate using that credential.
Remove an S3 User
An S3 user can be permanently removed from the Object Storage access settings.
Step 1: Select the User
Open the Access section.
Locate the required S3 user and select the ellipsis (…) icon next to the user.
Step 2: Remove the User
Select Remove and confirm the operation.
The selected user will be permanently removed.
Troubleshooting
Bucket Creation Is Not Available
If you cannot create a bucket:
- Confirm that Object Storage is available for your account.
- Verify that you are logged in to the correct CMP account.
- Confirm that you have the required permissions.
- Refresh the Object Storage page and try again.
The Bucket Is Not Visible
If a newly created bucket does not appear in the bucket list:
- Refresh the Object Storage page.
- Confirm that the bucket creation operation completed successfully.
- Verify that you are viewing the correct Object Storage account or project.
S3 Access Is Not Working
If an application or S3-compatible tool cannot access the bucket:
- Confirm that S3 access has been enabled.
- Verify the Access Key ID.
- Verify the Secret Access Key.
- Confirm that the credentials have not been deleted.
- Generate a new access key if the existing credentials are no longer available.
For S3-compatible application integration, refer to the relevant CMP Object Storage integration documentation.
An S3 Access Key Is No Longer Required
If an access key is no longer being used, remove it from:
Object Storage → Access → S3 Access Keys
Removing unused credentials helps maintain controlled access to Object Storage.
Important Notes
- Bucket names should be unique.
- Public access should only be enabled when public access is required.
- Keep S3 Secret Access Keys confidential.
- Do not share access credentials with unauthorized users.
- Verify the bucket before removing it.
- Verify the S3 user or access key before deleting it.
- Applications using a deleted access key will lose access through that credential.
- CMP Object Storage supports S3-compatible access for integration with S3-compatible tools and applications.
Conclusion
CMP Object Storage allows you to create and manage buckets for storing files and other objects. From the CMP Dashboard, you can create buckets, upload files, organize objects using folders, and remove resources that are no longer required.
For S3-compatible access, you can also create S3 users and generate an Access Key ID and Secret Access Key. Always protect these credentials and remove unused access keys to maintain secure access to your Object Storage resources.
FAQ’s
What is a bucket in Object Storage?
A bucket is a storage container used to store and organize objects such as files in Object Storage.
How do I create a bucket in CMP Object Storage?
Log in to the CMP Dashboard, navigate to Object Storage, select Create Bucket, enter a unique bucket name, and select Create Bucket.
Can I upload files directly to a bucket?
Yes. After creating a bucket, you can open it and upload files from your local machine.
Can I create folders inside a bucket?
Yes. Open the required bucket and select Create Folder to organize files into folders.
Can I make a bucket publicly accessible?
Yes. Public access can be enabled when creating the bucket using the Public Access option.
Warning: Enable public access only when the stored objects are intended to be publicly accessible.
How do I get S3 access credentials?
Navigate to Object Storage → Access, add an S3 account using + Add Account, and the system will generate an Access Key ID and Secret Access Key.
Can I delete an S3 access key?
Yes. Navigate to Object Storage → Access → S3 Access Keys, select the Delete icon for the required key, and confirm the deletion.
Can I remove an S3 user?
Yes. From the Access section, select the ellipsis (…) icon next to the user and select Remove.