Introduction
Cantech Cloud provides flexible backup options to protect your compute volumes. Users can choose between Full Backups, which copy the entire volume, and Incremental Backups, which only capture changes since the last backup. Backup plans allow you to define schedules, retention policies, and manage which volumes are included. By configuring backup plans correctly, you can ensure reliable recovery points while optimizing storage usage and costs.
There are two types of backups:
1- Full Backup : Copies the entire compute volume.
2- Incremental Backup : Copies only the changes made since the last backup.
To create a backup plan:
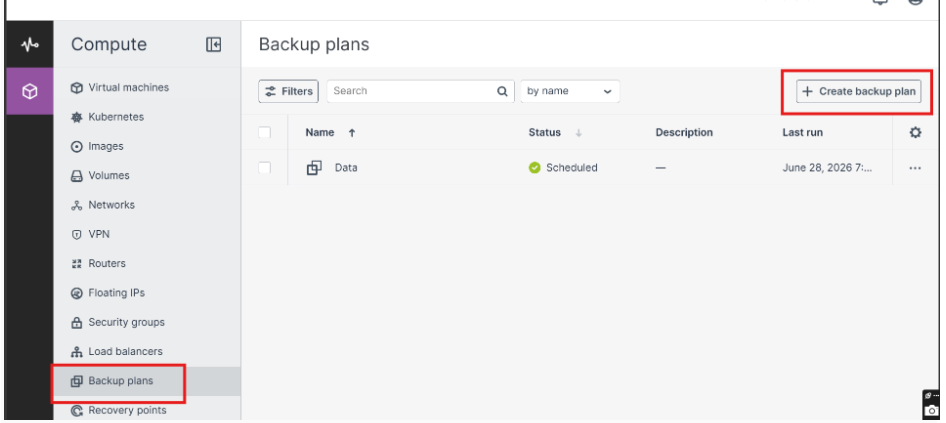
1. Go to the Backup Plans screen and click Create Backup Plan.
- In the Create Backup Plan window:
- Enter a name for the backup plan.
- Optionally, add a description (avoid personal or sensitive information).
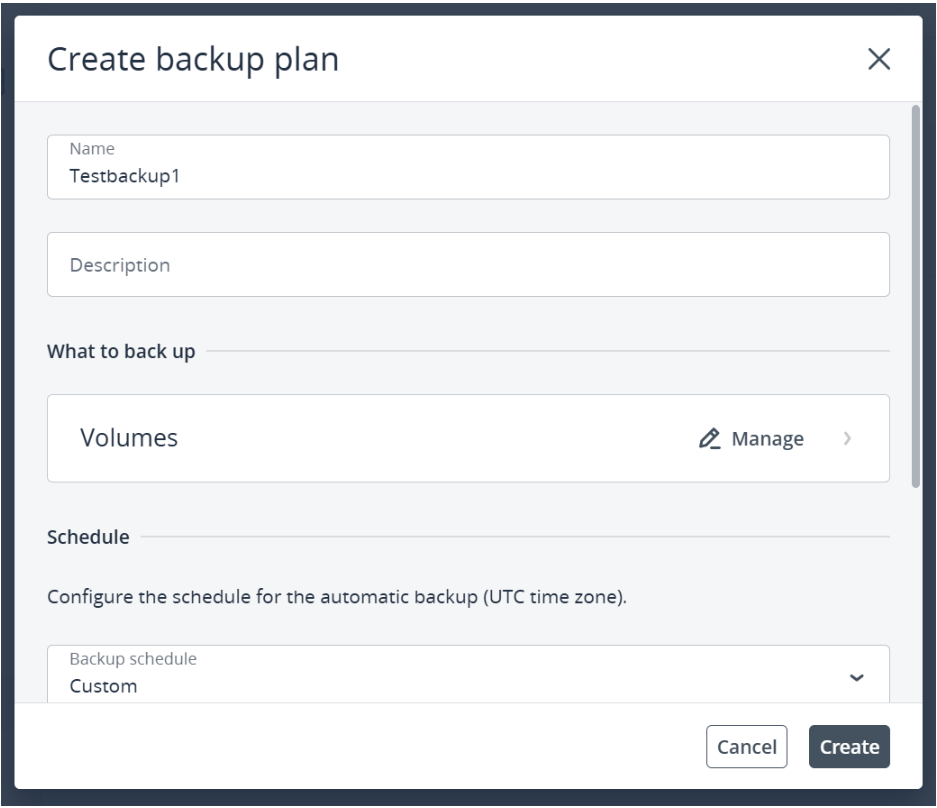
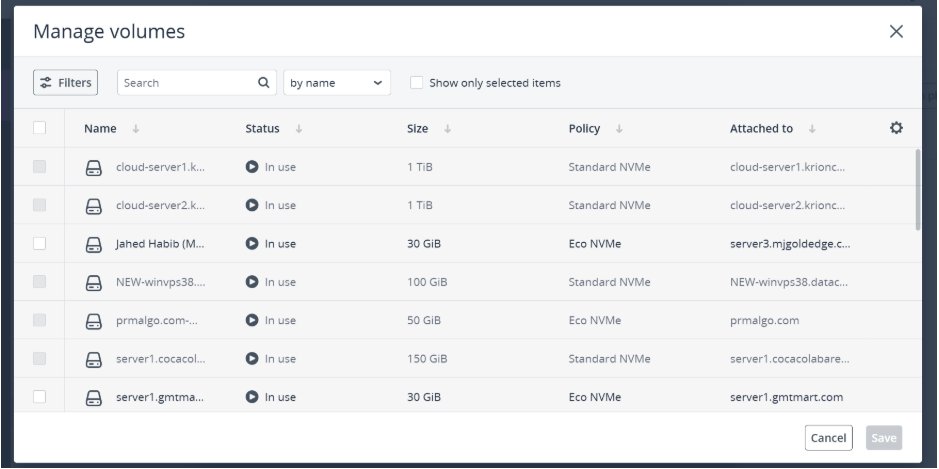
- Under What to back up, click Manage.
- In the Manage Volumes window, select the volumes you want to include in the backup plan.
- Click Save.
- Under Schedule, choose the backup schedule:
- Retention: 7 Days – Creates a daily backup of the selected volumes and keeps up to 7 full backup chains. In this case, the max number of recovery point is 1.
- Retention: 14 Days – Creates a daily backup of the selected volumes and keeps up to 14 full backup chains. In this case, the max number of recovery point is 2.
- Custom Retention – Allows you to set a custom backup schedule. You can choose specific months, days of the week, days of the month, backup time, and the maximum number of full recovery points to keep.
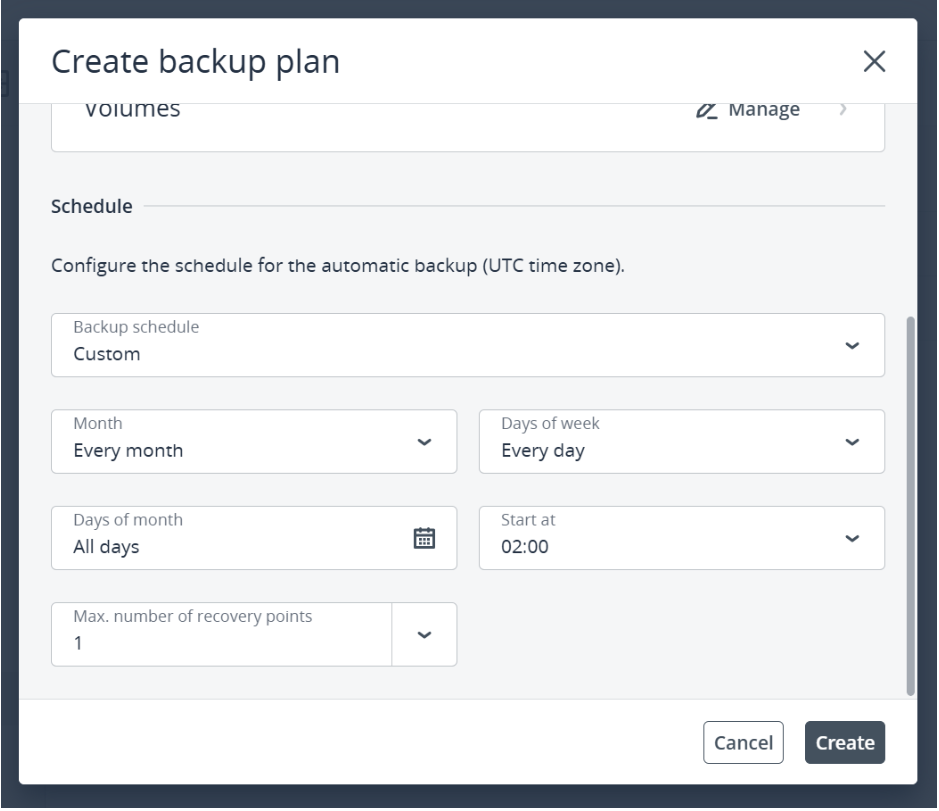
- Click Create.
To Add Volumes to a Backup Plan:
1. Go to the Backup Plans screen and select the backup plan you want.
2. On the right, open the Volumes to Back Up tab to see the current volumes.
3. Click Manage above the list.
4. In the Manage Volumes window, select the volumes you want to add.
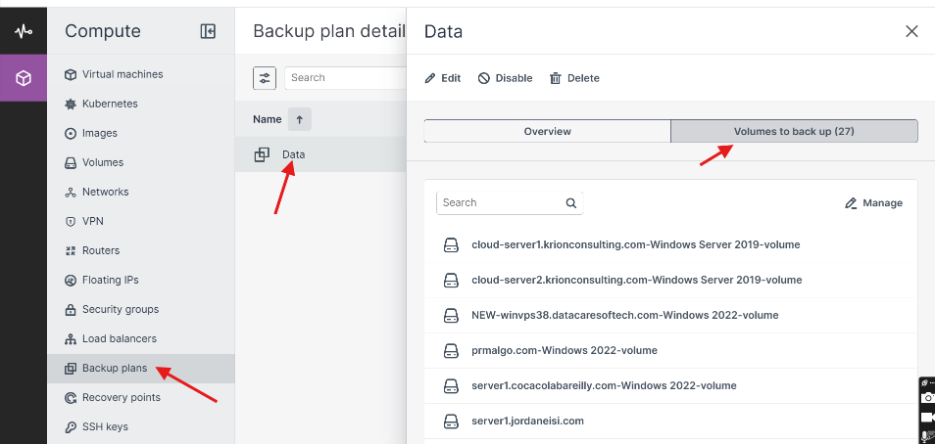
5. Click Save.
To Remove Volumes from a Backup Plan:
1. Go to the Backup Plans screen and select the backup plan you want.
2. On the right, open the Volumes to Back Up tab to see the current volumes.
3. Click Manage above the list.
4. In the Manage Volumes window:
-
Uncheck the volumes you want to remove.
-
To filter and view only assigned volumes, check Show Only Selected Items near the search bar.
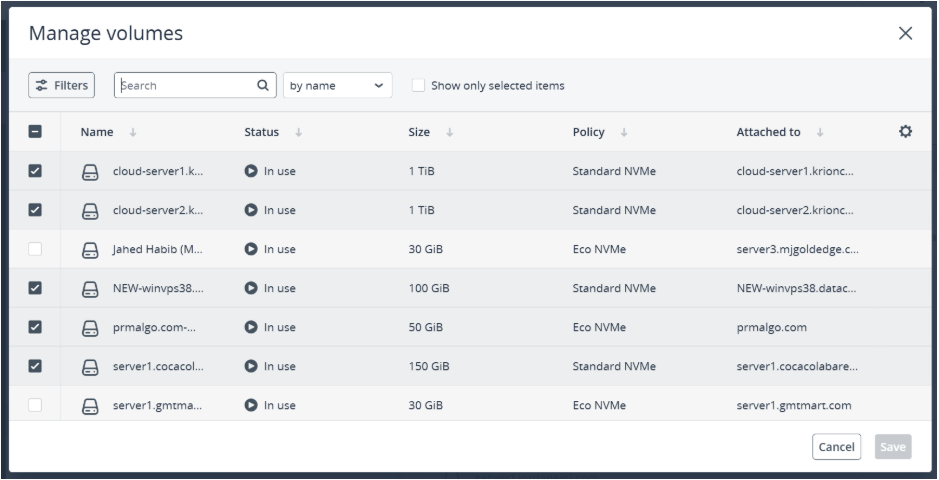
5. Click Save.
Troubleshooting
- Backup not running → Verify schedule and retention settings; ensure volumes are correctly assigned.
- Missing recovery points → Check retention policy (7‑day allows 1 point, 14‑day allows 2).
- Incorrect volumes backed up → Re‑open Manage Volumes and confirm selections.
- Backup plan changes not applied → Refresh dashboard and confirm “Save” was clicked after edits.
Important Notes
- Two backup types: Full (entire volume) and Incremental (changes since last backup).
- Retention directly affects number of recovery points (7 days → 1, 14 days → 2).
- Custom retention allows flexible scheduling (specific days/months/times).
- Always name backup plans clearly and avoid sensitive info in descriptions.
- Volumes can be added/removed anytime via Manage Volumes.
Conclusion
Backup plans in Cantech Cloud provide flexibility with full and incremental backups, but correct configuration is essential. By carefully setting retention, schedules, and managing volumes, users can ensure reliable recovery points while avoiding confusion or missed backups.
FAQ’s:
Q1. What types of backups are available?
A: Two types — Full Backup (entire volume) and Incremental Backup (only changes since the last backup).
Q2. How do I create a backup plan?
A: Go to Backup Plans → Create Backup Plan, name it, select volumes, set schedule/retention, then click Create.
Q3. What does retention mean?
A: Retention defines how long backups are kept:
- 7 days → 1 recovery point
- 14 days → 2 recovery points
- Custom → user‑defined schedule and recovery points.
Q4. Can I add or remove volumes later?
A: Yes. Use Manage Volumes in the backup plan to add or uncheck volumes, then save changes.