Accessing a Linux VM from Windows
You can connect to a Linux virtual machine from a Windows system using SSH (Secure Shell) or Remote Desktop Protocol (RDP) if a graphical interface is installed.
Requirements
Before connecting, ensure you have the following:
- The IP address of the Linux virtual machine.
- The SSH service is installed and running on the VM (default SSH port: 22).
- A valid username and password, or an SSH private key if key-based authentication is configured.
Method 1: Connect Using PuTTY (SSH Client)
Step 1: Install PuTTY
Download the latest version of PuTTY from the official website and install it on your Windows computer.
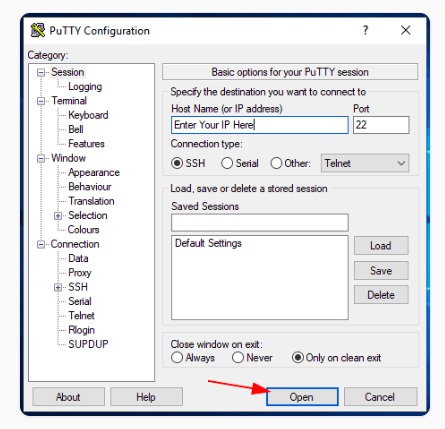
Step 2: Launch PuTTY
Open the PuTTY application.
- Enter the IP address of your Linux VM in the Host Name (or IP address) field.
- Verify that the Port is set to 22.
- Keep the connection type as SSH.
Step 3: Establish the Connection
Click Open.
The first time you connect, PuTTY will display the server’s SSH fingerprint.
Click Accept (or Yes) to continue.
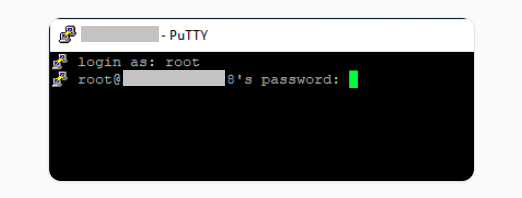
Step 4: Authenticate
When prompted:
- Enter the Linux username (for example, root or another user).
- Enter the corresponding password.
If you are using SSH key authentication, configure your private key by navigating to:
Connection → SSH → Auth
Then browse and select your .ppk private key file.
Method 2: Connect Using Windows Terminal or PowerShell
Step 1: Open Windows Terminal
Launch Windows Terminal, PowerShell, or Command Prompt.
Step 2: Connect Using SSH
Execute the following command:
ssh username@<Linux_VM_IP>Replace:
- username with your Linux account name.
- <Linux_VM_IP> with the IP address of the virtual machine.
Example:
ssh root@192.168.1.1Step 3: Login
Enter the password when prompted.
If SSH key authentication is configured, ensure your private key is located in the default Windows SSH directory:
C:\Users\<username>\.ssh\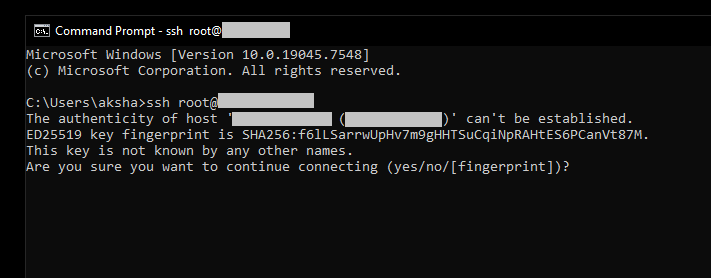
Method 3: Connect Using Remote Desktop (GUI Access)
If your Linux VM has a desktop environment installed, you can connect through Remote Desktop.
Step 1: Install XRDP on the Linux VM
Update the package list and install XRDP
sudo apt update
sudo apt install xrdp
Step 2: Enable the XRDP Service
Start the service and enable it to launch automatically after reboot.
sudo systemctl enable –now xrdpStep 3: Open Remote Desktop Connection
On your Windows machine:
- Open Remote Desktop Connection.
- Enter the Linux VM IP address.
- Click Connect.
Step 4: Sign In
Provide your Linux username and password to access the graphical desktop.
Connecting from one Linux system to another is simple using SSH. You can also use SCP for secure file transfers.
Requirements
Before connecting, verify that:
- You know the Linux VM’s IP address.
- SSH is installed and active on the VM.
- You have valid login credentials or an SSH key.
Method 1: Connect Using SSH
Step 1: Open the Terminal
Launch the Terminal application on your Linux computer.
Step 2: Run the SSH Command
Use the following command:
ssh username@<Linux_VM_IP>Example:
ssh ubuntu@192.168.1.100Step 3: Authenticate
Enter your password when prompted.
If you are using an SSH key, verify that the key exists in your local SSH directory.
Example:
~/.ssh/id_rsaEnsure the private key has the correct permissions.
chmod 600 ~/.ssh/id_rsaMethod 2: Access Using Cockpit (Web Interface)
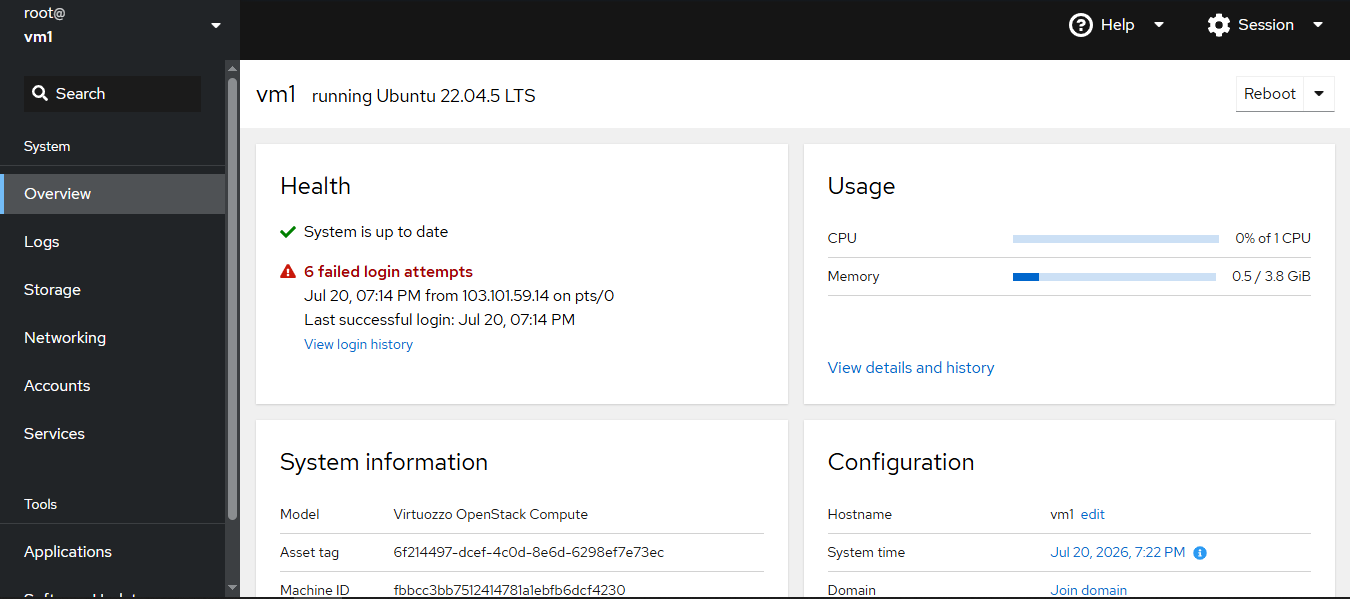
Cockpit provides a browser-based interface for managing Linux systems.
Step 1: Install Cockpit
Log in to your Linux VM using SSH and install Cockpit.
For Ubuntu/Debian:
sudo apt update
sudo apt install cockpit -y
For RHEL, Rocky Linux, AlmaLinux, or CentOS:
sudo dnf install cockpit -yStep 2: Enable and Start the Cockpit Service
Enable the Cockpit socket so that it starts automatically during system boot, and then start the service.
sudo systemctl enable cockpit.socket
sudo systemctl start cockpit.socket
Verify that the Cockpit socket is running.
sudo systemctl status cockpit.socketStep 3: Allow Port 9090 Through the Firewall (Optional)
If your firewall is enabled, allow access to TCP port 9090.
Ubuntu (UFW):
sudo ufw allow 9090/tcp
sudo ufw reload
RHEL/Rocky/AlmaLinux:
sudo firewall-cmd –permanent –add-service=cockpit
sudo firewall-cmd –reload
Step 4: Verify Cockpit is Listening
Run the following command to verify that Cockpit is listening on port 9090.
sudo ss -tulnp | grep 9090Expected output:
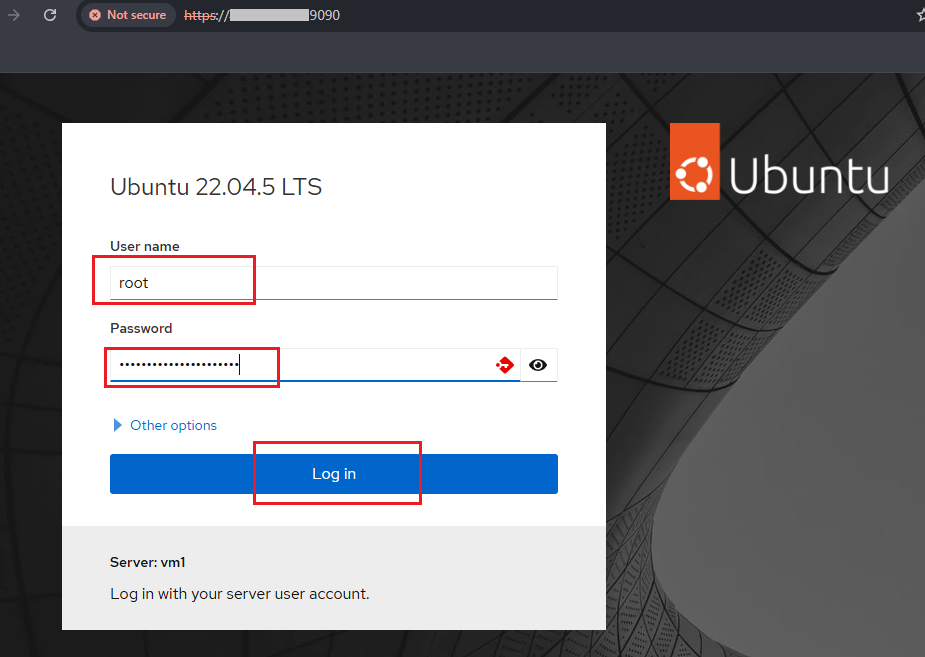
LISTEN 0 4096 *:9090Step 5: Open Cockpit in a Web Browser
On your Windows or Linux computer, open your preferred web browser and enter the following URL:
https://<Linux_VM_IP>:9090Step 6: Log In to Cockpit
On the Cockpit login page, enter your Linux VM credentials.
Troubleshooting
Connection Refused
If you cannot establish an SSH connection:
Check whether the SSH service is running.
sudo systemctl status sshIf necessary, start the service.
sudo systemctl start sshEnsure the firewall permits SSH traffic.
sudo ufw allow sshAuthentication Failed
If login fails:
- Verify the username and password.
- If using an SSH key, confirm the correct private key is selected.
- Make sure the private key permissions are set properly.
chmod 600 ~/.ssh/id_rsaTimeout Issues:
- Verify the Linux VM is running and accessible via the network.
- Check network configurations and routes.