A VM flavor defines the compute resources assigned to a Virtual Machine, such as vCPUs, RAM, and storage specifications. If your workload requirements change, you can easily switch to a different flavor without creating a new VM.
Follow the instructions below to update the flavor of your VM in Cloud.
Step 1: Sign In to Cloud
Log in to your Cloud account using your credentials.
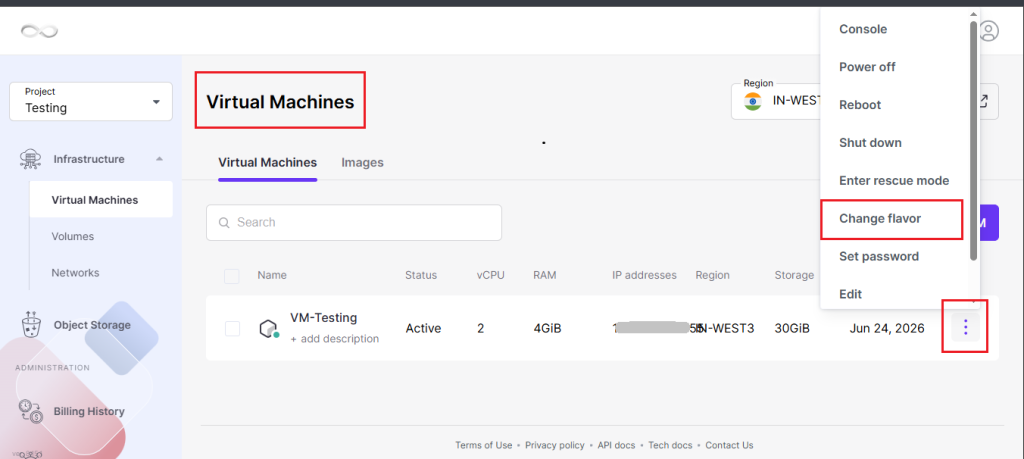
After logging in, navigate to the Virtual Machines section where all your deployed VMs are displayed.
Step 2: Locate the Target Virtual Machine
Find the Virtual Machine whose resources you want to modify.
On the right side of the VM entry, click the three-dot (⋮) action menu to view available management options.
Step 3: Select “Change Flavor”
From the list of available actions, click Change Flavor.
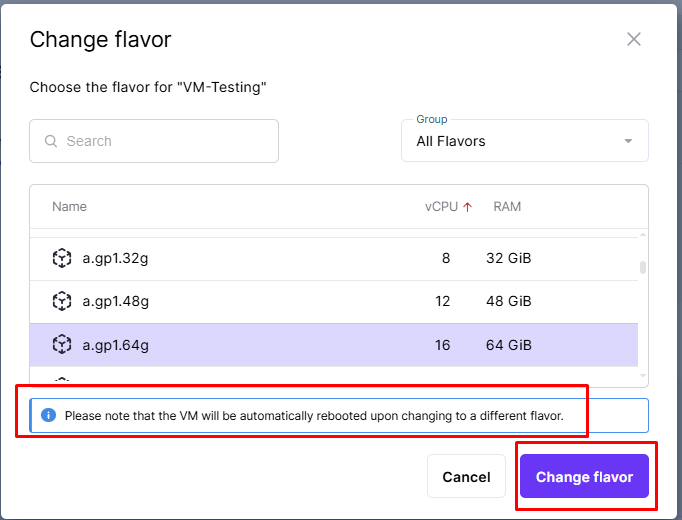
This will open the flavor selection window, displaying all available VM configurations.
Step 4: Choose a Suitable Flavor
Review the available flavor options and select the configuration that best matches your requirements.
- You can choose to upgrade (increase resources) or downgrade (decrease resources) based on your current requirements.
Verify the selected configuration before proceeding.
Step 5: Confirm the Flavor Change
After selecting the desired flavor, click the Change Flavor button to submit the request.
Cloud will begin applying the new resource configuration to the VM.
Step 6: Wait for the Process to Complete
The platform will update the VM configuration automatically.
Once the operation is finished, the updated flavor information will be visible in the VM details section of the dashboard.
Important Notes :
- No data loss: Changing the flavor does not affect the data or configuration inside the VM.
- Downtime: A short reboot may occur while the flavor is being applied.