Cloud delivers a flexible and scalable cloud infrastructure that helps you deploy virtual machines based on your workload requirements. Whether you’re hosting applications, building development environments, or performing testing and data analysis, you can quickly create and manage Windows virtual machines through the Cloud platform.
If you want to create a Windows Virtual Machine using the standard Cloud Dashboard, refer to the relevant documentation.
To deploy a Windows Virtual Machine using the Cloud Advanced Dashboard, follow these instructions.
Step 1: Open the Advanced Dashboard
Log in to your Cloud account.
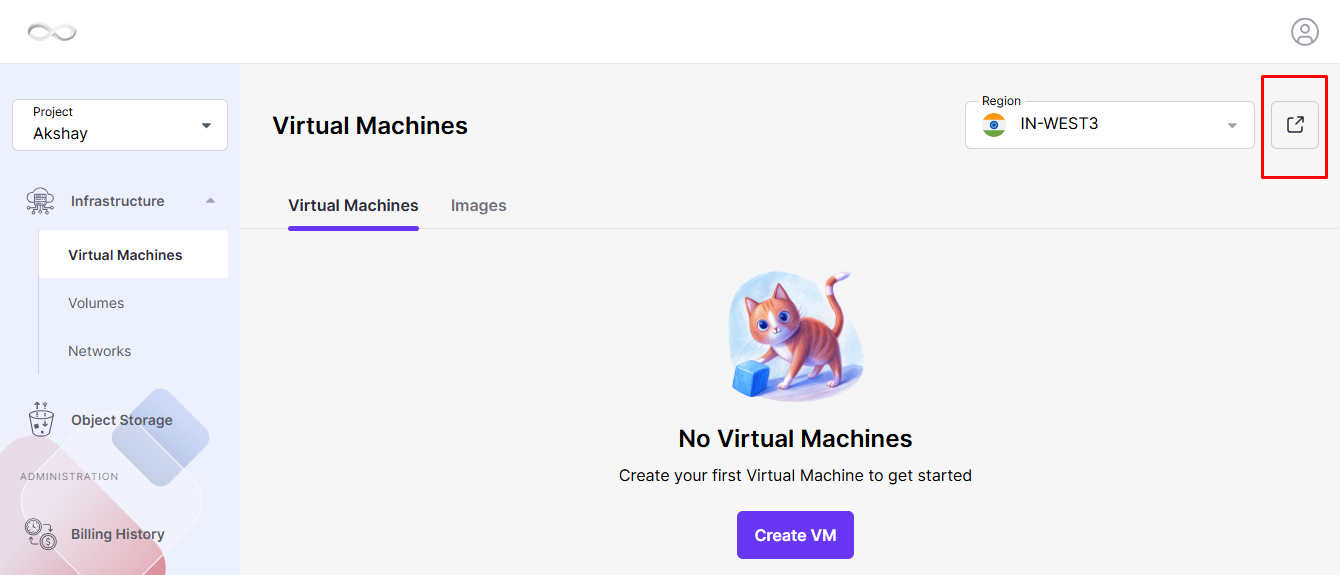
Navigate to the required region and click the arrow icon to open the Region Advanced Dashboard. From this dashboard, you can deploy, configure, and manage your virtual machines.
Step 2: Start Creating a Virtual Machine
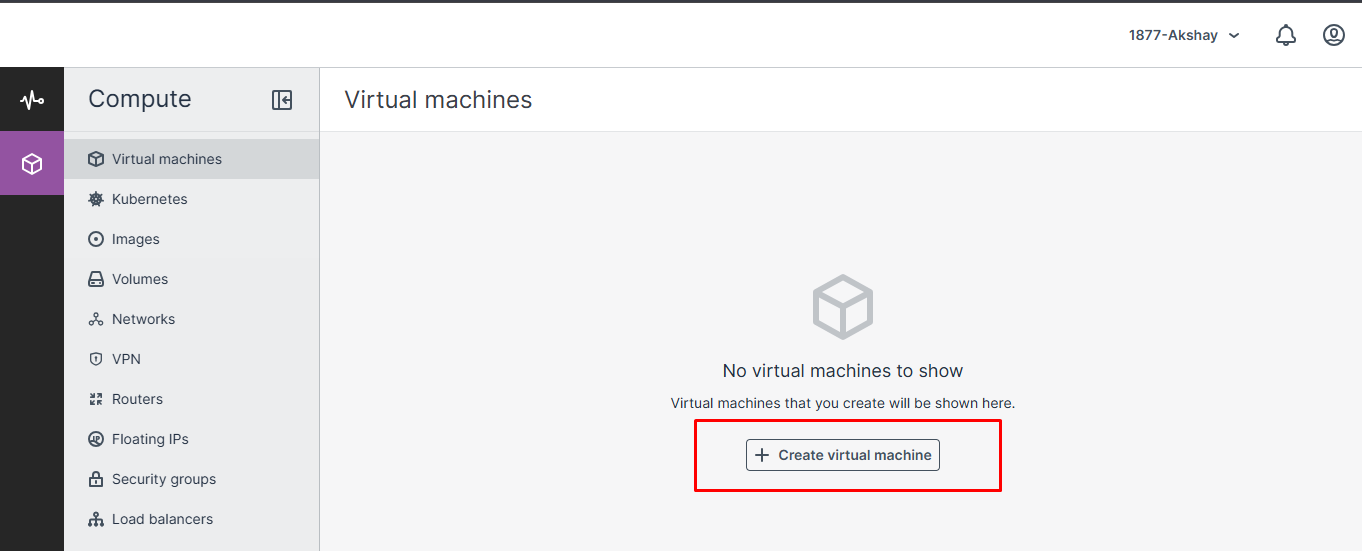
Click the + Create Virtual Machine button.
This opens the virtual machine deployment wizard where you can configure all required settings before launching the instance.
Step 3: Configure the Virtual Machine
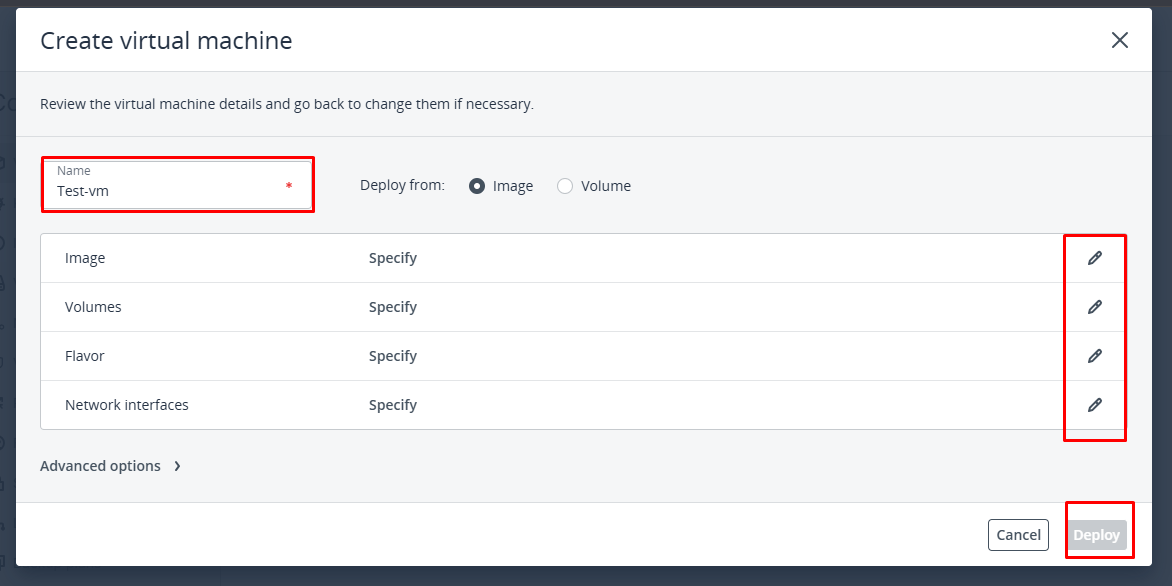
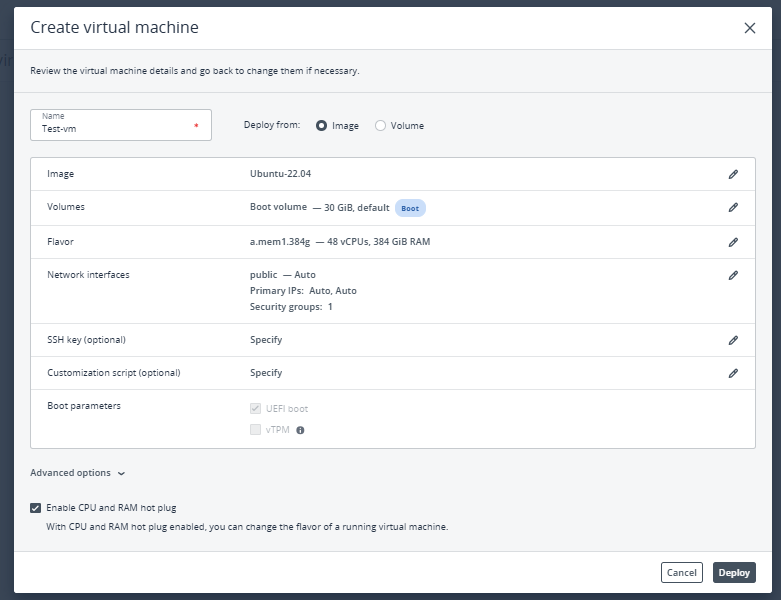
Enter the Virtual Machine Name
Provide a unique and meaningful name for your virtual machine.
You can customize additional settings such as:
- Image
- Boot Volume
- Flavor
- Network Interface
To modify any of these options, click the Edit (Pencil) icon next to the respective section.
Option 1: Deploy Using an Existing Volume
Deploying from a volume allows you to launch a virtual machine using an existing boot volume that already contains an operating system, installed software, and stored data.
This option is useful when you want to:
- Restore a previously used virtual machine.
- Move an existing operating system to another VM.
- Keep all current applications, configurations, and data intact.
Steps
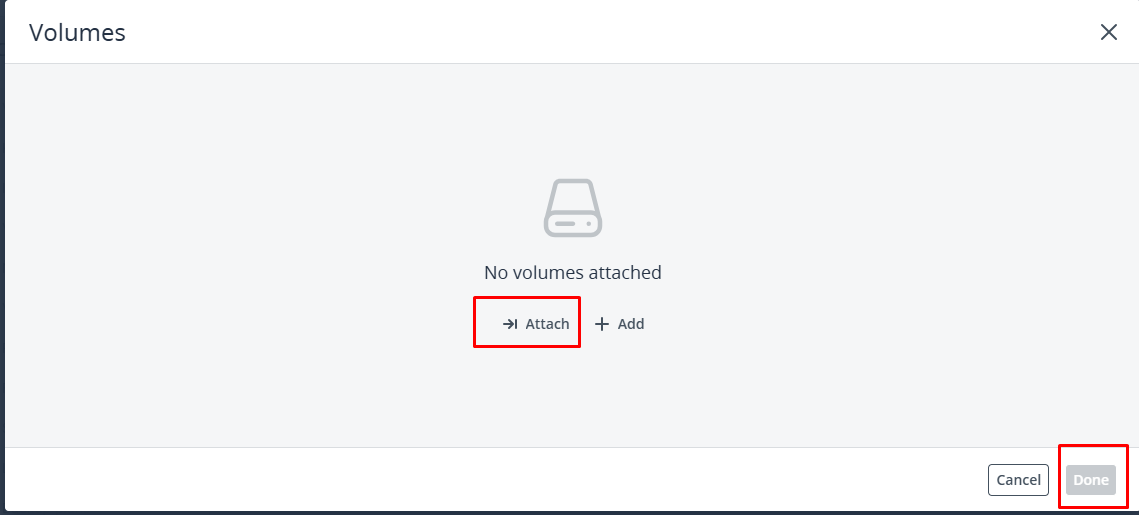
- Click the Pencil icon beside the boot source.
- Select Attach Boot Volume.
- Choose the required boot volume from the list.
- Click Attach.
The selected volume will now become the boot disk for the virtual machine.
Option 2: Deploy Using an Image
Creating a virtual machine from an image installs a fresh operating system using a predefined image, similar to installing Windows on a new computer.
This method is recommended when creating a completely new virtual machine.
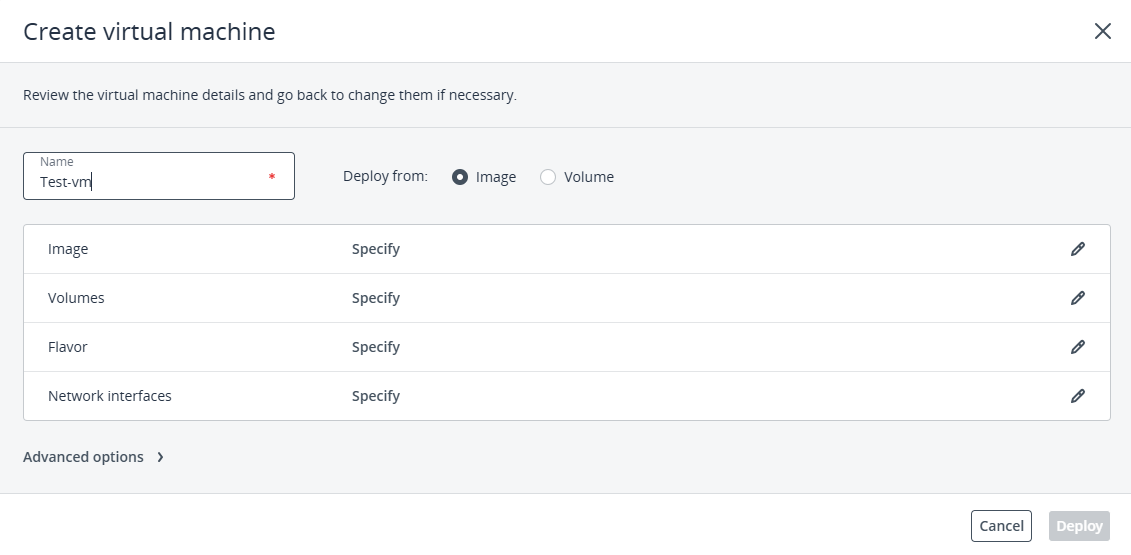
Select the Operating System Image
Choose the operating system image you want to use from the available image library.
If you have previously uploaded a custom image, you can select it from the Custom Images section.
After selecting the image, click Done.
Note
If you want to use your own ISO image, you can upload it.
For more information about uploading images, refer to the Image Management documentation.
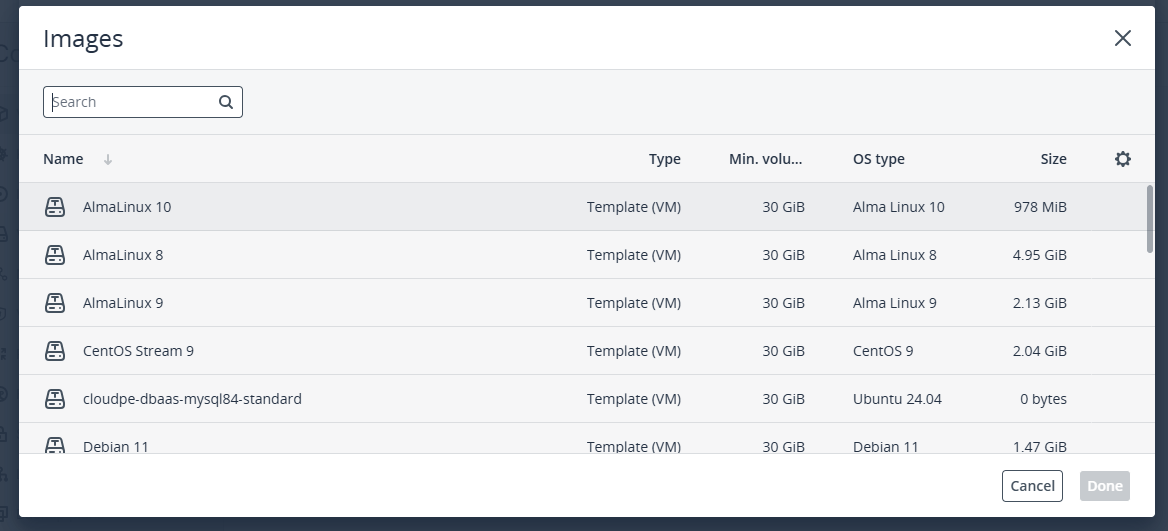
Select the Virtual Machine Flavor
Choose a flavor based on the amount of computing resources your virtual machine requires.
The selected flavor determines:
- Number of vCPUs
- RAM allocation
- Other hardware resources
Ensure that the selected flavor satisfies the minimum hardware requirements of the operating system you selected.
Once you’ve chosen the appropriate flavor, click Done.
Example
Certain Windows Server editions require additional CPU cores and memory. Always verify that your selected flavor provides enough resources for smooth operation.
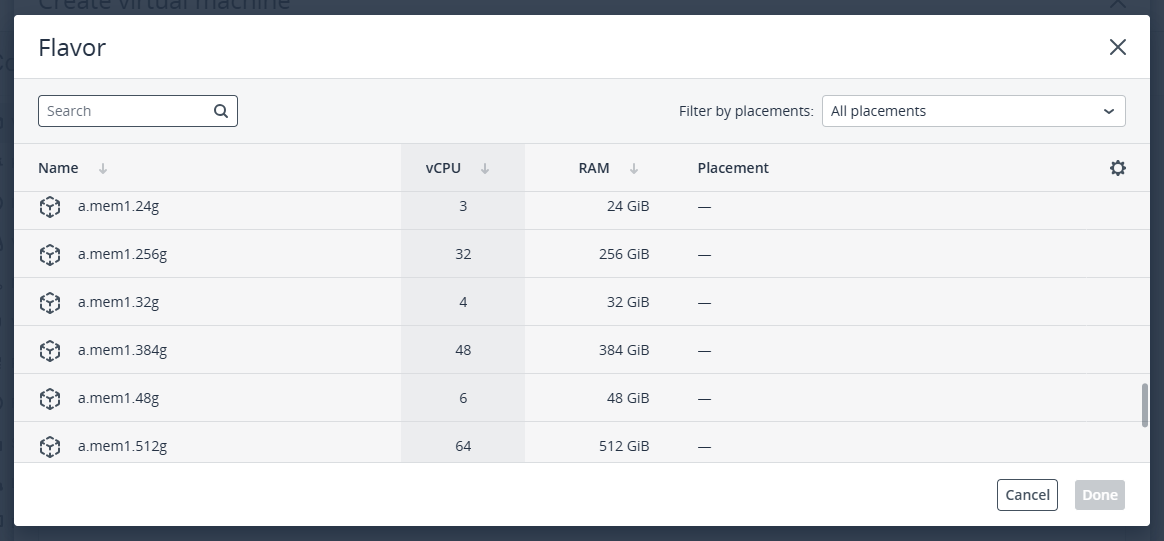
Configure the Network Interface
Inside the Add Network Interface window, select the compute network that the virtual machine should connect to.
By default, a primary Public IP address is assigned automatically.
If you prefer assigning a specific Public IPv4 address manually:
- Uncheck Assign Automatically.
- Enter the preferred Public IPv4 address.
- Select the desired Public IP from the dropdown list.
- Click Add.
Recommendation
Assign a Public IP address during the initial deployment to simplify remote access and avoid future connectivity issues.
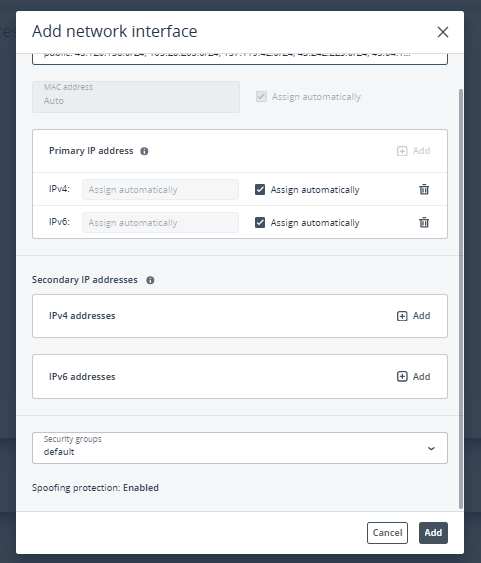
Add Secondary IP Addresses (Optional)
You can also configure additional IP addresses if required.
Unlike the primary IP address, secondary IP addresses are not configured automatically inside the Windows operating system.
After deployment, you must configure these additional addresses manually within the guest operating system.
Configure Private Networking (Optional)
If your virtual machine requires a Private IP address, you must first create a Virtual Private Network (VPN).
Once the VPN is available, you can attach the virtual machine to the private network.
Refer to the VPN documentation for complete setup instructions.
Security Group Configuration
If the selected network has IP Address Management enabled:
- Spoofing Protection is enabled automatically.
- The Default Security Group is applied automatically.
The default security group permits both inbound and outbound traffic to the virtual machine.
After reviewing the settings, click Done.
Add an SSH Public Key
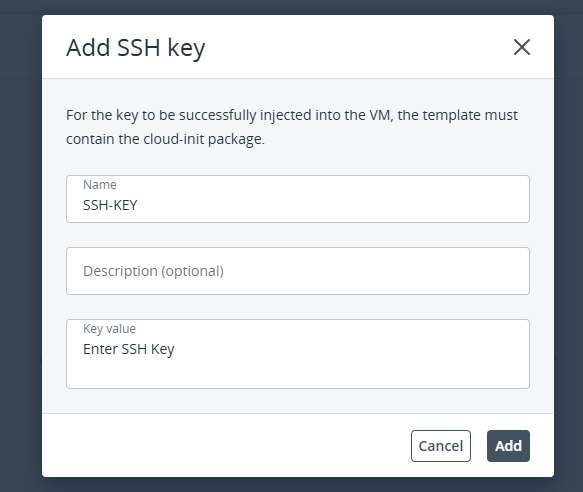
Click Add SSH Key if you want to use SSH key-based authentication.
Select or upload the public SSH key that was generated on the computer from which you plan to access the virtual machine.
For additional information, refer to the SSH Key Authentication guide.
Step 4: Advanced Configuration (Optional)
Add a Customization Script (User Data)
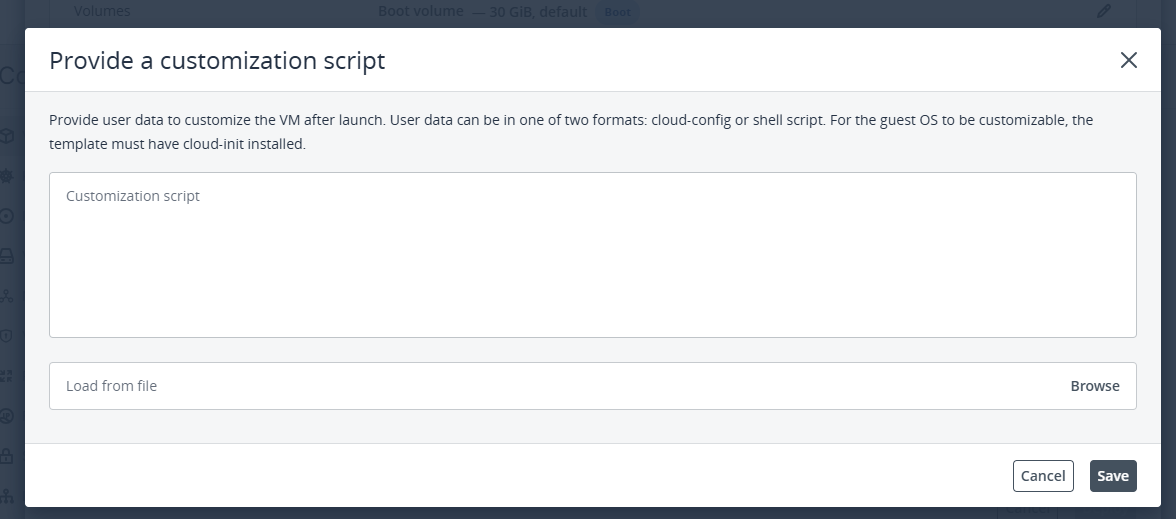
You can provide User Data to perform automatic configuration tasks immediately after the virtual machine starts.
User Data may be supplied as:
- A cloud-init YAML configuration file
- A shell script containing commands to execute during the first boot
This feature is useful for installing software packages, configuring services, or applying system settings automatically.
Enable CPU and RAM Hot Plug
The CPU and RAM Hot Plug feature allows you to increase or modify CPU and memory resources while the virtual machine is running.
Because these changes can be applied without restarting the virtual machine, you can scale resources with minimal disruption and avoid downtime.
Step 5: Deploy the Virtual Machine
After reviewing all configuration settings, click Deploy.
Cloud will begin provisioning your Windows virtual machine.
Once deployment is complete, the virtual machine is created successfully and is ready for use.
Manage the Virtual Machine
To view or manage the virtual machine:
- Navigate to the Virtual Machines section.
- Click the name of the newly created virtual machine.
From the VM details page, you can monitor its status, manage resources, configure networking, and perform other administrative tasks.