Overview
CMP allows you to change the storage tier of supported NVMe volumes without detaching the disk, restarting the virtual machine, or causing downtime. Storage policy changes between Standard NVMe and Pro NVMe are applied live, allowing you to increase performance or reduce costs as your workload changes.
Supported Live Changes
- Standard NVMe → Pro NVMe
- Pro NVMe → Standard NVMe
No Downtime • No Data Loss • Live Storage Policy Change
Storage Tiers
| Storage Tier | Max IOPS | Max Throughput | Storage Architecture | Live Tier Change |
| Eco NVMe | 15,000 | 500 MB/s | Erasure Coding | ❌ Not Supported |
| Standard NVMe | 25,000 | 1,000 MB/s | 3× Replication | ✅ Upgrade to Pro |
| Pro NVMe | 50,000 | 2,000 MB/s | 3× Replication | ✅ Downgrade to Standard |
Note: Eco NVMe uses Erasure Coding and cannot be converted to Standard or Pro using a live storage policy change. A new volume must be created, and the data must be migrated manually.
Before You Begin
- Ensure you have access to the CMP Advanced Panel.
- The storage policy option is not available in the standard CMP Dashboard.
- The volume can remain attached to a running VM during the change.
- No reboot or detachment is required.
Accessing the Advanced Panel
- Log in to the CMP Dashboard.
- Select the appropriate region.
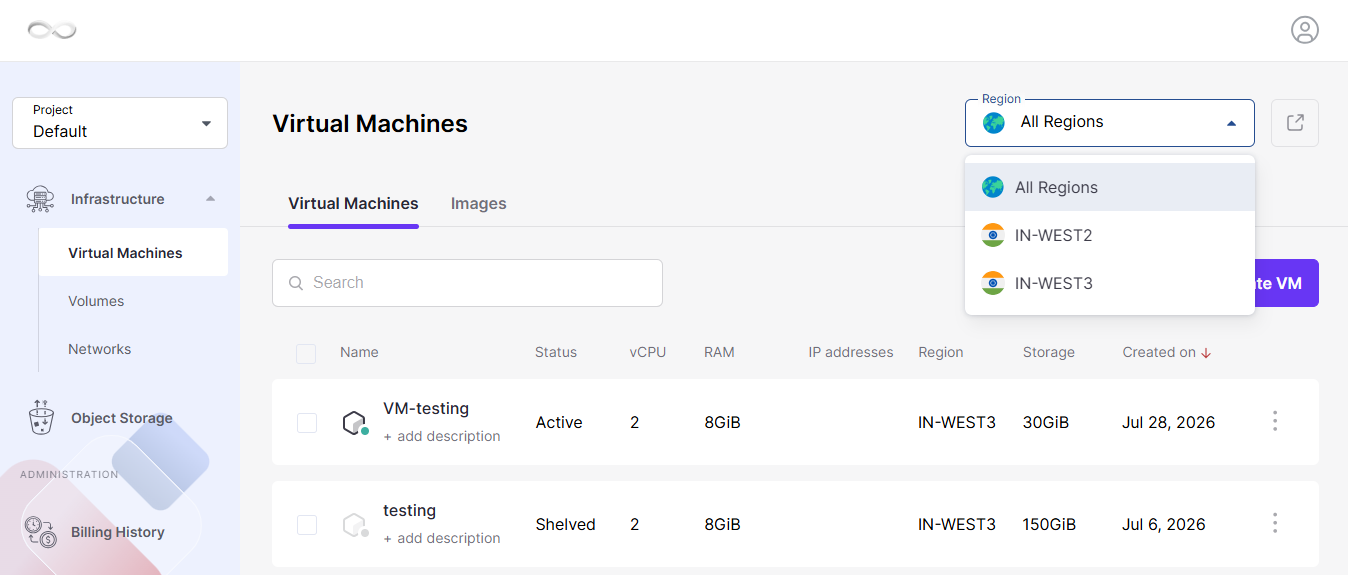
- Click the Advanced Panel (external link icon (↗) ) for your selected region.
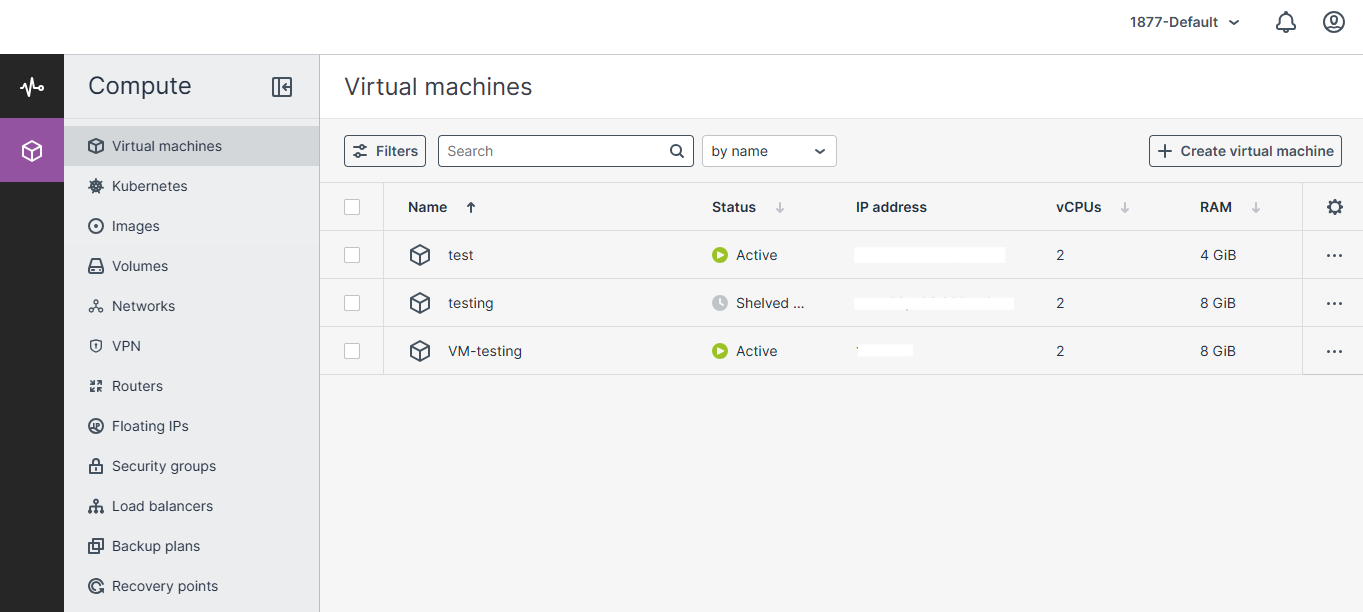
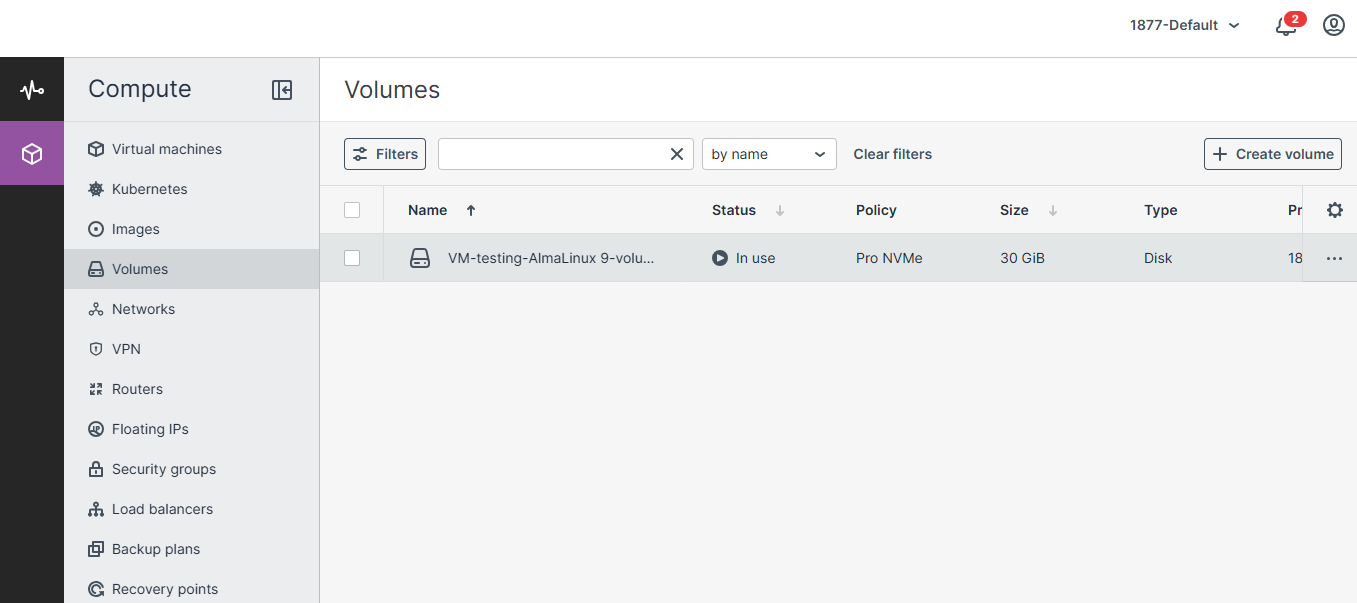
- Navigate to Volumes.
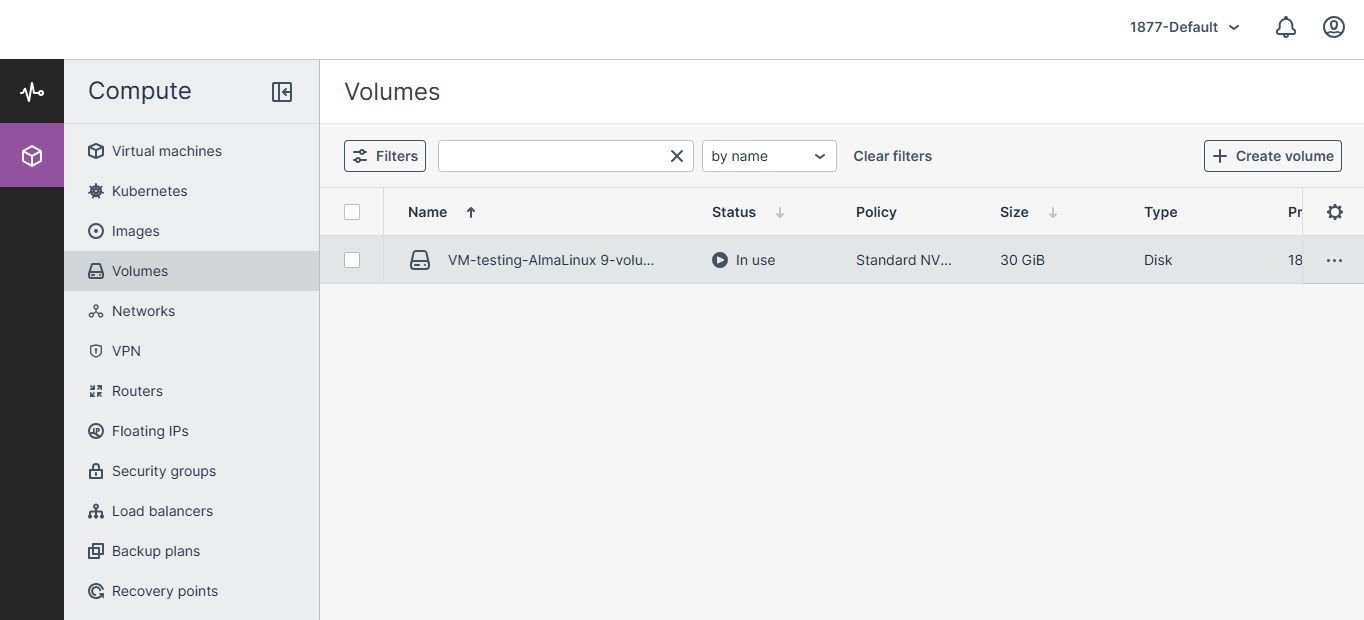
Upgrade Standard NVMe to Pro NVMe
- Open Volumes in the Advanced Panel.
- Select the volume you want to upgrade.
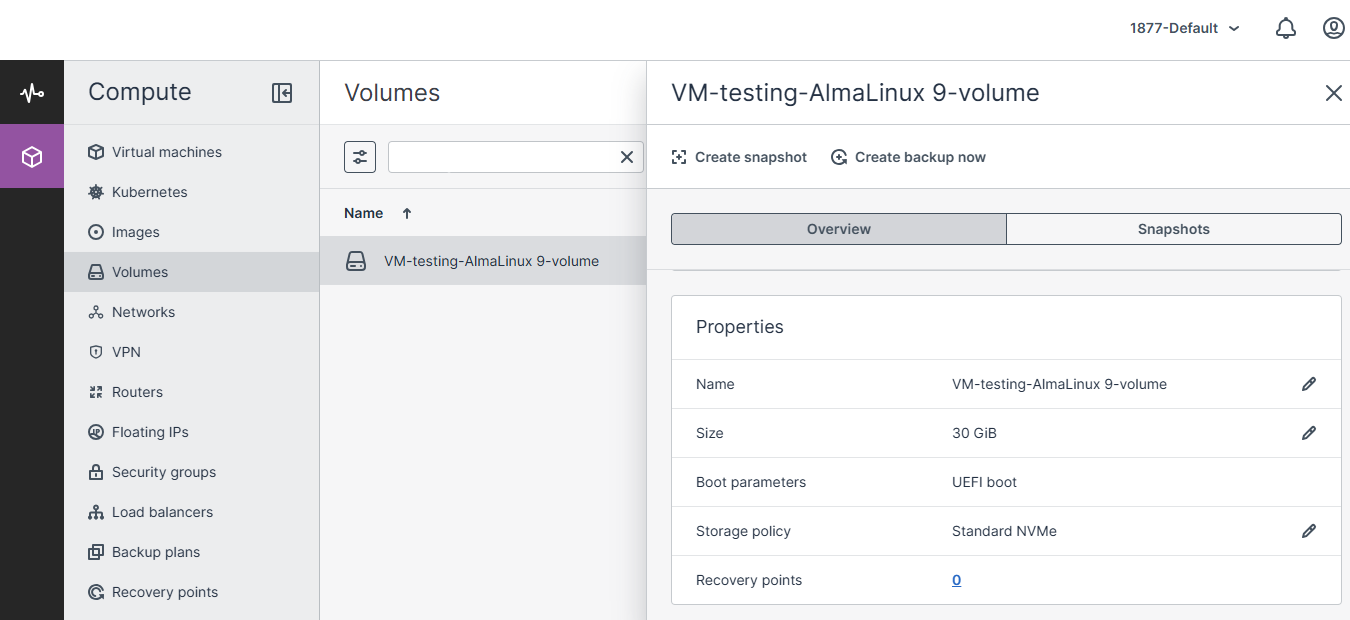
- Locate the Storage Policy field under Properties.
- Click the Edit (Pencil) icon.
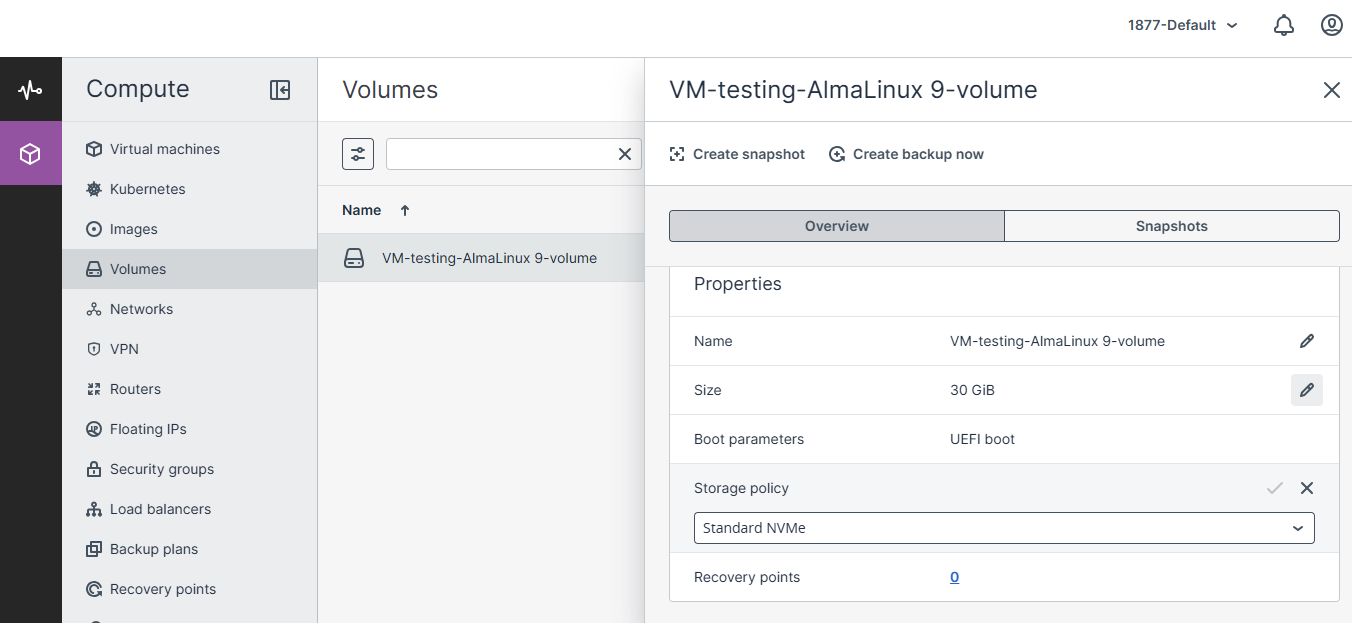
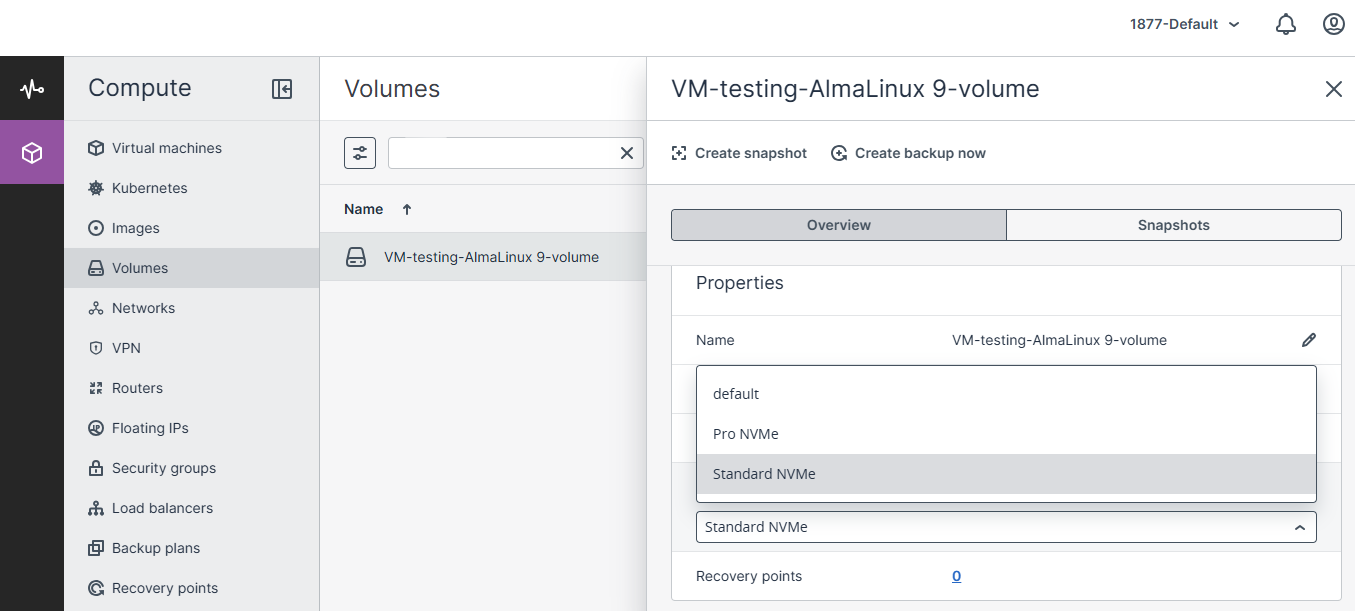
- Select Pro NVMe from the drop-down menu.
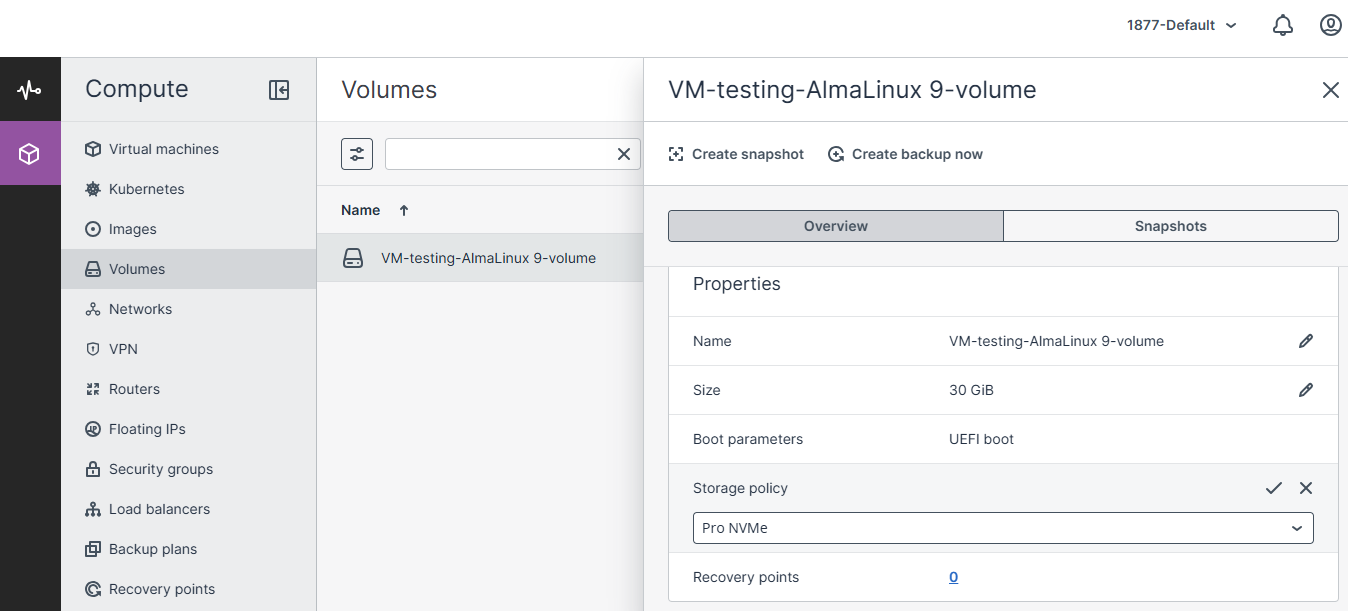
- Click Save (✓).
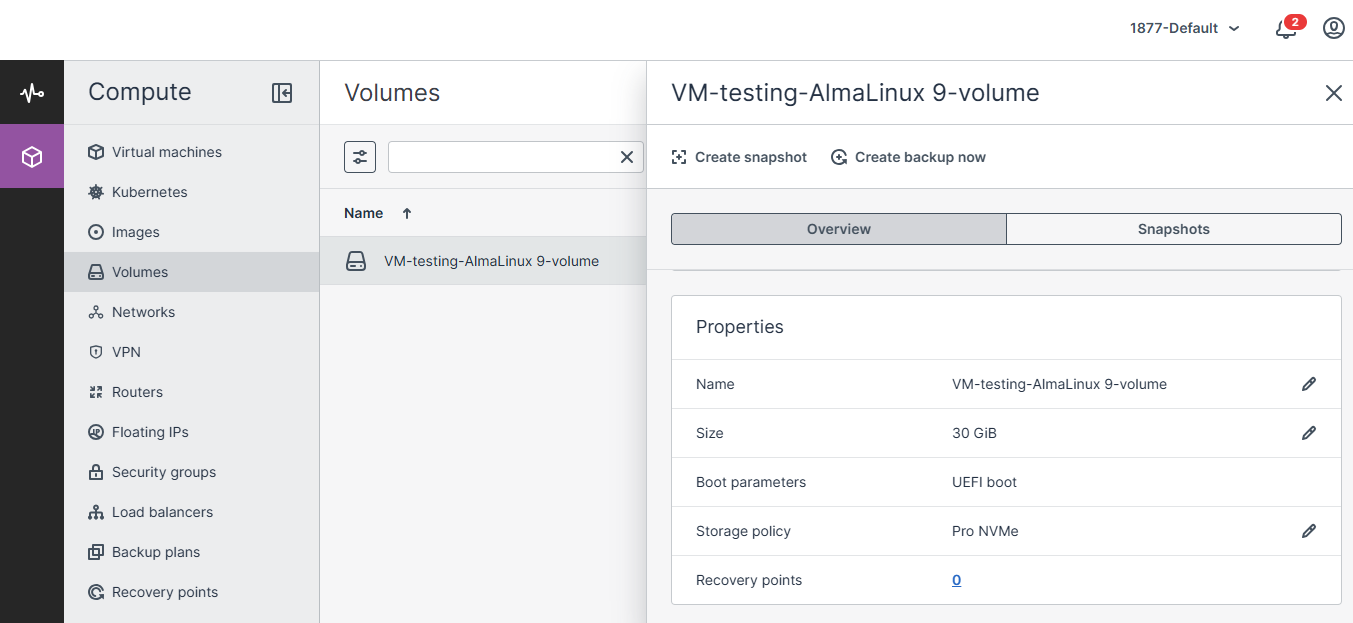
- The storage policy is updated immediately.
Performance after upgrade
- Up to 50,000 IOPS
- Up to 2,000 MB/s throughput
- Zero downtime
- No interruption to the running virtual machine
Downgrade Pro NVMe to Standard NVMe
- Open the desired volume from the Volumes section.
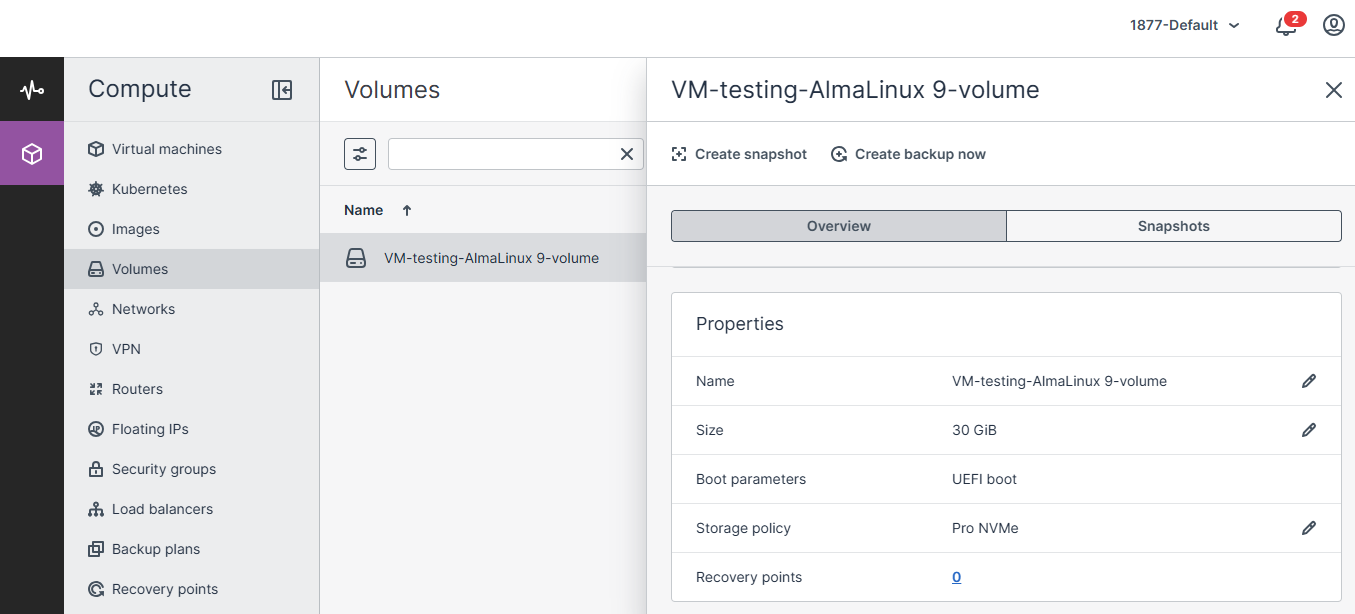
- Click the Edit (Pencil) icon beside Storage Policy.
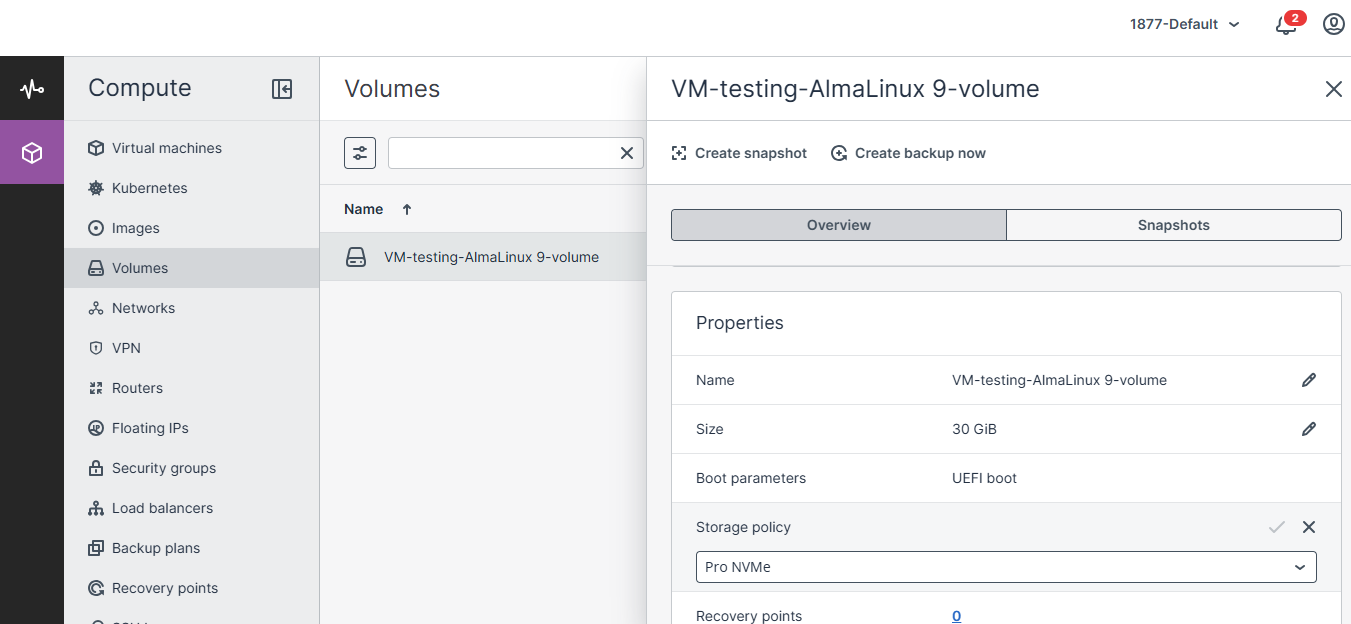
- Choose Standard NVMe.
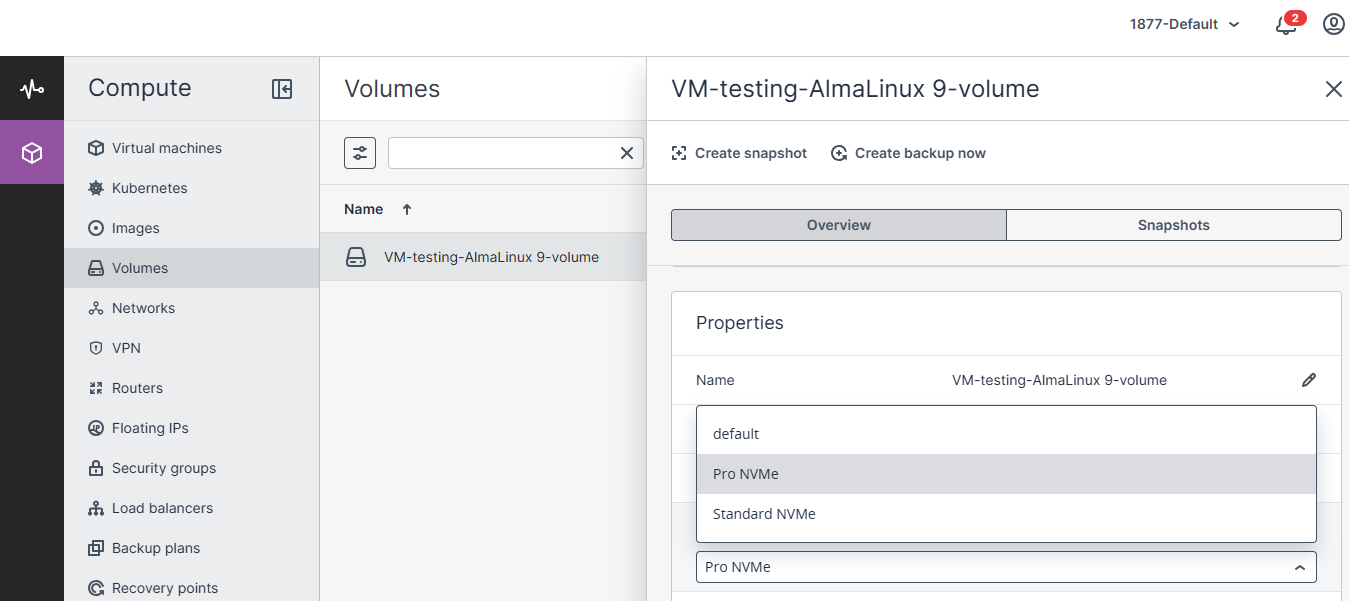
- Click Save (✓).
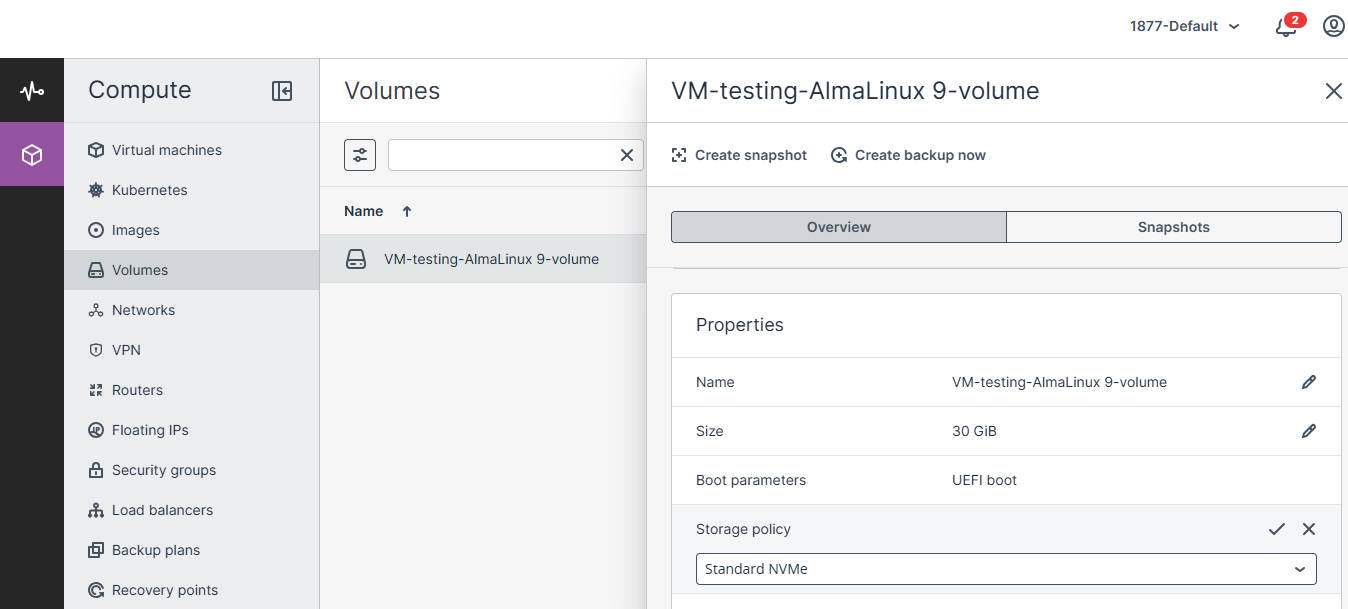
- The volume continues operating normally while the storage policy changes.
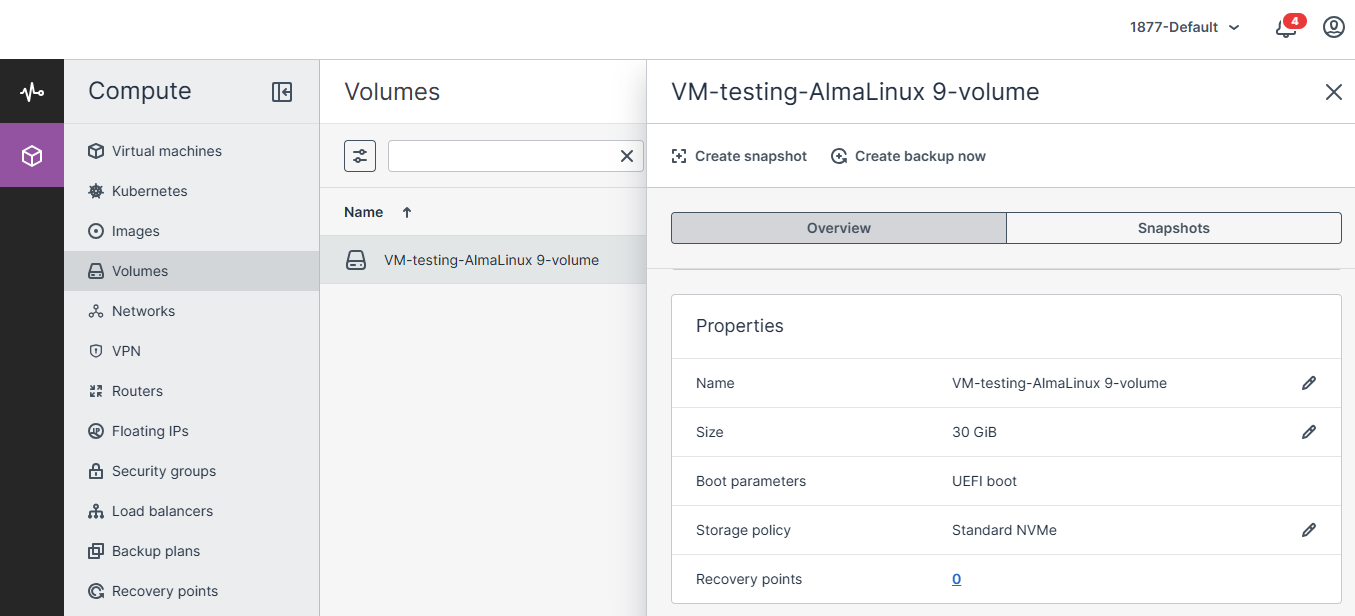
Performance after downgrade
- Up to 25,000 IOPS
- Up to 1,000 MB/s throughput
- No data loss
- No VM restart required
Rules & Limitations
Supported
- Live upgrade from Standard NVMe to Pro NVMe
- Live downgrade from Pro NVMe to Standard NVMe
- Storage policy changes while the volume is attached
- Immediate application of the selected storage tier
Not Supported
- Eco NVMe → Standard NVMe
- Eco NVMe → Pro NVMe
- Standard/Pro → Eco NVMe
- Storage policy changes from the standard CMP Dashboard
- Partial volume policy changes
Conclusion
CMP allows seamless live storage tier changes between Standard NVMe and Pro NVMe without downtime, reboot, or data migration. Eco NVMe cannot be converted through a live policy change because it uses a different storage architecture and requires a new volume with manual data migration.