1. Overview
UFW (Uncomplicated Firewall) is a simple command-line tool used to manage firewall rules on Linux systems, primarily Ubuntu and Debian-based distributions.
UFW is installed by default on most Ubuntu Server installations, but it is not enabled by default. You must enable it manually after configuring the required firewall rules.
This guide explains how to install, configure, and manage UFW.
2. Prerequisites
Before you begin, ensure that you have:
- A Linux server running Ubuntu or Debian.
- Root or sudo privileges.
- SSH access already configured if you are managing the server remotely.
3. Verify That UFW Is Installed
Check whether UFW is installed:
which ufwIf UFW is not installed, install it using:
sudo apt install ufw -y4. Check the UFW Status
View the current firewall status:
sudo ufw status
5. Configure Default Firewall Policies
It is recommended to configure the default firewall policies before enabling UFW.
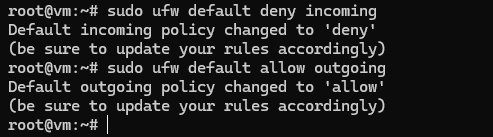
Block all incoming connections:
sudo ufw default deny incomingAllow all outgoing connections:
sudo ufw default allow outgoingThis configuration blocks all incoming traffic while allowing all outgoing traffic.
6. Allow Required Services
Before enabling UFW, allow any services that require network access.
Allow SSH
For the default SSH port:
sudo ufw allow sshIf SSH uses a custom port (for example, 2222):
sudo ufw allow 2222/tcpNote: Allow SSH before enabling UFW to avoid losing remote access.
Allow HTTP and HTTPS
sudo ufw allow 80/tcp
sudo ufw allow 443/tcp
Allow MySQL
sudo ufw allow 3306/tcpAllow Traffic from a Specific IP Address
sudo ufw allow from 192.168.xx.xx7. Enable UFW
Before enabling the firewall, verify that SSH access has been allowed.
Check the current rules:
sudo ufw statusEnsure that one of the following rules is present:
- OpenSSH
- 22/tcp
- Your custom SSH port (for example, 2222/tcp)
Important: If SSH is not allowed before enabling UFW, you may lose remote access to the server.
Enable the firewall:
sudo ufw enableDisplay the current firewall configuration:
sudo ufw status verbose8. Enable UFW Logging
Enable logging for monitoring and troubleshooting:
sudo ufw logging on9. Verify IPv6 Support
If IPv6 is enabled on the server, verify that UFW is configured to manage IPv6 traffic.
Check the UFW configuration:
sudo grep IPV6 /etc/default/ufwIf IPv6 support is disabled in UFW, services may still be accessible over IPv6 even when IPv4 access is restricted.
10. Cloud Security Groups and UFW
Cloud Security Groups operate at the network level, while UFW operates inside the Linux operating system.
- Cloud Security Groups determine whether traffic can reach the Virtual Machine.
- UFW determines whether traffic is allowed or blocked inside the Virtual Machine.
How They Work Together
- If a port is blocked by the Cloud Security Group, traffic will not reach the Virtual Machine, even if UFW allows it.
- If a port is allowed by the Cloud Security Group, UFW can still block access inside the Virtual Machine.
Best Practice
For improved security, use both:
- Cloud Security Groups as the first layer of protection.
- UFW as the second layer inside the server.
11. View Firewall Rules with Numbers
Display all configured firewall rules with line numbers:
sudo ufw status numberedThis makes it easier to identify and remove specific rules.
12. Remove a Firewall Rule
First, display the numbered rules:
sudo ufw status numberedRemove a rule by specifying its number:
sudo ufw delete <rule_number>Example:
sudo ufw delete 3